Blog

Blog

Tips, tutorials, and case studies from D3M Follow to help you grow your presence on Instagram, TikTok, YouTube, Telegram and more.
Welcome to the D3M Follow Blog! Here, we share expert insights, actionable tips, and the latest trends in social media marketing. Whether you're looking to grow your Instagram followers, boost TikTok engagement, or master Facebook ads, we've got you covered.

Latest articles

TikTok Watch Time & Completion Rate: How the Algorithm Interprets Viewer Behavior

TikTok Watch Time & Completion Rate: How the Algorithm Interprets Viewer Behavior

Creators often fixate on watch time as if it were a standalone success metric. They see 45 seconds of average watch time and assume their content performed well. But watch time means nothing without context. A 45-second watch time on a 60-second video signals something completely different than 45 seconds on a 90-second video. The algorithm doesn't celebrate raw duration it evaluates whether viewers stayed as long as the content implied they should.

This is why videos with "decent" watch time still stop expanding. The number itself isn't the signal. The signal is what that number reveals about viewer expectations and whether the content fulfilled them. When a video stops at 3,000 views despite 35 seconds of average watch time, the problem isn't that 35 seconds is too low it's that 35 seconds relative to the video's length, pacing, and promise indicated something to the algorithm about audience satisfaction that didn't justify further investment.

Understanding how TikTok interprets watch time and completion rate requires thinking beyond surface metrics and into the decision logic that converts viewer behavior into distribution choices. These aren't performance indicators creators should celebrate or lament they're diagnostic signals the system uses to determine whether content warrants exposure to broader audiences.

What TikTok Actually Measures When It Measures Watch Time

Watch time on TikTok is not a single metric it's multiple measurements interpreted differently depending on video length, audience segment, and distribution stage.

Absolute watch time is the raw seconds someone spends watching. If your video is 60 seconds and the average viewer watches 42 seconds, that's the absolute watch time. But absolute watch time alone tells the algorithm very little. A 42-second watch on a 60-second video means something entirely different than 42 seconds on a 120-second video.

Relative watch time is what actually matters. This is the percentage of the video watched. The algorithm cares whether viewers stayed through 70% of a 60-second video or only 35% of a 120-second video, even though both produce similar absolute numbers. Relative watch time reveals whether the content held attention proportional to its length and implied value.

The distinction matters because TikTok's distribution system doesn't reward duration it rewards attention retention relative to what the content asked for. A 15-second video with 90% completion generates stronger signals than a 90-second video with 50% completion, even though the latter has higher absolute watch time. The algorithm interprets high relative retention as evidence that the content matched viewer expectations and delivered value efficiently.

Duration context further refines interpretation. The system knows that viewer tolerance for length varies by content type, account history, and audience segment. Educational content might sustain 80-second watch times with 65% completion. Entertainment content might need to deliver full value in 25 seconds to achieve similar completion rates. The algorithm doesn't apply universal standards it evaluates performance within the behavioral norms of similar content and audiences.

This is why creators who extend videos artificially to boost watch time often see worse distribution. If a 30-second concept gets stretched to 60 seconds with filler, absolute watch time might increase slightly, but completion rate drops significantly. The algorithm interprets this as content that promised more value than it delivered, or content that wasted viewer time. The system penalizes inefficiency, not brevity.

Completion Rate as a Signal of Expectation Fulfillment

Completion rate is the percentage of viewers who watch a video from start to finish. On the surface, it seems like a binary metric: did they finish or not? But algorithmically, completion rate functions as a proxy for whether content fulfilled the promise established in its opening moments.

When someone clicks on a video or allows it to autoplay, they form an immediate expectation based on the first frame, caption, hook, and audio. If they watch through to the end, the algorithm infers that the content met or exceeded that expectation. If they exit early, the system infers a mismatch between promise and delivery.

High completion rate signals content efficiency. It tells the system that viewers found sufficient value to justify staying through the entire duration. This doesn't mean the content was "good" in a subjective sense it means the content accurately represented itself and delivered what it implied. The algorithm rewards this because it indicates the content won't waste the time of future viewers shown the same video.

Low completion rate, especially when paired with decent initial retention, signals a specific problem: the opening established interest but the middle or end failed to sustain it. This is different from videos with low initial retention, where viewers reject the content immediately. Low completion with decent initial retention means the hook worked, but the content didn't follow through.

This distinction has significant distribution consequences. A video with 85% retention through the first 5 seconds but only 30% completion tells the algorithm that the content is good at capturing attention but poor at delivering value. The system might test it against one more audience segment to see if different viewers respond better, but if completion remains low, expansion stops. The algorithm interprets this as content that misleads or disappoints viewers a pattern it won't scale.

Completion rate becomes especially decisive when the algorithm evaluates whether to expand beyond niche audiences. In early distribution stages, the system tests content on highly aligned viewers people whose behavior history suggests they're interested in this topic. These viewers tolerate longer setups and niche references. But when the system considers expanding to broader audiences, completion rate becomes a threshold metric. If niche audiences didn't complete the video at high rates, broader audiences almost certainly won't. The algorithm stops expansion to prevent resource waste.

This is why videos can receive 5,000 views with 40% completion and stop, while videos with 5,000 views and 70% completion continue expanding. Same view count, different signals. The system interprets low completion as evidence that further distribution would show the content to people increasingly unlikely to find it valuable.

Retention Curves and Drop-Off Points

Retention curves map exactly when viewers exit a video. The algorithm doesn't just measure average watch time it tracks second-by-second retention patterns and identifies where mass exits occur.

Early drop-offs are algorithmically severe. If 40% of viewers exit within the first 3 seconds, the system interprets this as immediate rejection. The opening failed to establish value fast enough. This is worse than gradual decline because it indicates a fundamental mismatch between what the content appeared to offer and what viewers wanted. The algorithm won't invest distribution resources in content that generates instant rejection from even small audience samples.

Mid-video drop-offs at specific timestamps indicate structural problems. If retention drops sharply at 18 seconds into a 45-second video, the algorithm registers this as a predictable failure point. Perhaps the content shifts tone, introduces irrelevant information, or loses narrative momentum. The system doesn't analyze "why" creatively it just observes that a significant portion of viewers consistently decide at that moment that continued watching isn't worth their time.

When this pattern repeats across audience segments, the algorithm interprets it as content with an inherent weakness that won't improve with broader distribution. If niche audiences who are predisposed to like this content type still exit at the same point, general audiences will behave even worse. Expansion stops because the signals predict poor performance at scale.

Late drop-offs are far less damaging. If viewers watch 80% of a video then exit, the algorithm interprets this as acceptable. The content delivered most of its value; viewers simply didn't need or want the ending. This doesn't prevent expansion because the system infers that most viewers found the content worthwhile. Late exits don't indicate promise-delivery mismatch they indicate viewer choice to move on after extracting sufficient value.

Retention curve shape matters as much as average. A video with 50% average retention but smooth, gradual decline performs differently than a video with 50% average retention but sharp drops at multiple points. Smooth decline suggests content that naturally loses some viewers over time but maintains core audience interest. Sharp drops indicate specific failure points where the content actively pushed viewers away.

The algorithm uses retention curve shape to predict performance in expanded distribution. Content with smooth curves is safer to scale because performance is consistent and predictable. Content with erratic curves is risky because it's unclear which audience segments will tolerate the failure points and which will reject them immediately.

Watch Time Across Distribution Stages

Watch time doesn't exist in isolation it functions within TikTok's multi-stage distribution system. The same watch time metric generates different algorithmic interpretations depending on which stage it occurs in and which audience segment is watching.

In Stage 1 distribution, the system tests content against 200-500 highly aligned users. These are people whose behavioral history suggests strong interest in this content type. Watch time performance here sets the baseline. If a video achieves 55% completion rate and 38-second average watch time in Stage 1, the algorithm uses these numbers as benchmarks for subsequent stages.

When the system decides whether to advance content to Stage 2, it doesn't just ask "was Stage 1 performance good?" It asks "was Stage 1 performance strong enough to justify testing against a broader, less aligned audience?" This is where context matters. 55% completion might be excellent for dense educational content but weak for entertainment content. The algorithm compares performance against historical norms for similar content from similar accounts.

In Stage 2 distribution, the audience widens to 1,000-3,000 users who are moderately aligned. Watch time typically declines here because less specialized viewers have lower tolerance for niche content, slower pacing, or assumed knowledge. The algorithm expects this decline. What it evaluates is the magnitude of decline.

If watch time drops from 38 seconds in Stage 1 to 32 seconds in Stage 2, that's a normal, acceptable decrease. The algorithm interprets this as content that performs slightly worse with broader audiences but still maintains viability. Expansion continues.

But if watch time drops from 38 seconds to 18 seconds, that's a collapse. The algorithm interprets this as content that only works for highly specialized viewers and will perform progressively worse as audiences broaden further. Expansion stops because the signals predict that Stage 3 would produce even weaker results, wasting distribution resources.

Signal stability across stages is what enables viral potential. Videos that go viral don't just perform well in Stage 1 they maintain performance across Stages 2, 3, and beyond. Watch time might decline slightly as audiences broaden, but completion rate remains relatively stable. This tells the algorithm the content has universal or near-universal appeal within its category.

The system continues expanding because the signals suggest that showing the content to even wider audiences will still generate acceptable engagement. Stable signals predict stable performance at scale.

This is why "my video got 3,000 views then stopped" is often a Stage 2 collapse story. The video performed adequately in Stage 1 (200-500 views), earned expansion to Stage 2 (1,000-3,000 views), but completion rate or watch time dropped so sharply in Stage 2 that the algorithm stopped further expansion. The content found its audience people who are already interested in this specific topic but couldn't translate beyond that niche.

Understanding how the distribution system operates across these stages reveals why watch time alone doesn't predict success. It's watch time performance relative to audience alignment that determines expansion.

Common Misinterpretations Creators Make

"My watch time is high but my video stopped getting views"

This usually means watch time is high in absolute terms but low relative to video length, or high in Stage 1 but collapsed in Stage 2. Creators see "42-second average watch time" and think that sounds good. But if the video is 75 seconds long, that's only 56% completion potentially weak depending on content type and historical performance.

Alternatively, the video might have achieved strong watch time with the initial highly-aligned audience but performed poorly when expanded to less specialized viewers. The algorithm stopped distributing not because watch time was universally low but because watch time declined sharply enough to indicate the content wouldn't perform well at broader scale.

"Short videos always perform better"

This assumes the algorithm prefers brevity. It doesn't. The algorithm prefers efficiency. A 15-second video with 90% completion performs excellently. But a 15-second video with 60% completion performs worse than a 45-second video with 75% completion. Length only matters insofar as it affects whether viewers stay through the full duration.

Short videos have an advantage in completion rate because viewers tolerate brief durations more easily. But if a short video doesn't deliver sufficient value in that brief window, completion rate drops and the length advantage disappears. The algorithm rewards value delivery relative to time asked, not time asked in isolation.

"I need to make longer videos to increase watch time"

This misunderstands what the algorithm optimizes for. Extending a 30-second concept to 60 seconds with filler might marginally increase absolute watch time, but it tanks completion rate and creates retention curve drop-offs. The system interprets this as content that disrespects viewer time a negative signal.

Longer videos only perform better when they justify their length with proportional value. Educational deep-dives, storytelling narratives, or complex demonstrations can sustain 90-120 second durations with strong completion if every segment delivers value. But adding length without adding value consistently produces worse distribution outcomes.

"Engagement matters more than watch time"

This creates a false hierarchy. The algorithm doesn't prioritize one signal over another it evaluates signal combinations. High engagement (likes, comments, shares) with low watch time generates a specific inference: the content sparked reaction but didn't hold attention. This might work for provocative or polarizing content that generates discussion, but it's algorithmically weaker than high engagement paired with high watch time.

The strongest distribution outcomes occur when multiple signals align: high completion rate, strong watch time, and meaningful engagement. Each signal reinforces the others, creating a comprehensive picture of content that audiences find valuable enough to finish, enjoy enough to engage with, and compelling enough to share.

Diagnostic Framework for Watch Time and Completion Rate

Different combinations of watch time and completion rate tell different stories about content performance and algorithmic interpretation.

High completion rate (>70%) + low reach (<1,000 views):
The content performs well with highly aligned audiences but the algorithm hasn't identified a large enough audience segment to expand into. This typically indicates niche content that delivers value efficiently but appeals to limited demographics. Not a content problem an audience size constraint.

Moderate completion rate (50-70%) + moderate reach (3,000-10,000 views):
Standard performance. The content found its natural audience, delivered acceptable value, and reached its ceiling. The algorithm correctly identified that broader expansion wouldn't improve results. This is the most common outcome for most content.

Low completion rate (<40%) + early stop (<500 views):
Immediate rejection. The opening failed to establish value for even the most aligned viewers. The algorithm stopped distribution in Stage 1 because signals indicated that subsequent stages would perform worse. Hook failure or severe promise-delivery mismatch.

High watch time (>60% of video length) + declining reach after initial wave:
Strong Stage 1 performance but Stage 2 collapse. The content worked well for niche audiences but didn't translate when expanded to less specialized viewers. The algorithm stopped distribution to prevent resource waste on audiences unlikely to engage.

Inconsistent completion rate across similar view cohorts:
Volatile signals. Some audience segments complete the video at high rates, others exit early, without clear pattern. The algorithm struggles to identify optimal audience targeting. Distribution becomes inefficient, so expansion slows or stops.

High engagement + low completion rate:
Provocative or polarizing content. Viewers react without watching fully. The algorithm interprets this as content that generates discussion but doesn't deliver sustained value. Distribution might continue but won't scale as aggressively as content with both engagement and completion.

These patterns aren't prescriptive they're diagnostic. The goal is understanding what specific signal combinations reveal about how the algorithm interpreted audience behavior, not "fixing" individual videos retroactively.

How Retention Signals Connect to Broader Algorithmic Logic

Watch time and completion rate don't exist in isolation they function as inputs into a larger decision system that evaluates content viability across multiple dimensions.

The TikTok algorithm uses retention metrics to infer whether content will generate positive user experiences at scale. High completion rates signal content that respects viewer time and delivers expected value. Low completion rates signal the opposite content that misleads, disappoints, or wastes time. The system optimizes for aggregate user satisfaction, which means rewarding content that generates positive experiences and withdrawing resources from content that generates negative ones.

This is why understanding retention patterns requires understanding the broader distribution logic. A video doesn't fail because completion rate was 45% instead of 55%. It stops expanding because 45% completion, combined with retention curve shape, engagement patterns, and performance across audience segments, signaled to the algorithm that further distribution would likely produce worse results.

Retention rate analysis provides even deeper insight into how the algorithm interprets second-by-second viewer behavior and converts those observations into distribution decisions. The system doesn't just ask "did people watch?" it asks "at what specific moments did people decide to stop watching, and what does that pattern reveal about content structure and audience-content alignment?"

Reframing Watch Time as Decision Input, Not Vanity Metric

A video with 35-second average watch time didn't achieve "35 seconds of success." It generated a data point that the algorithm interpreted within a complex evaluation framework. That interpretation determined whether the video received additional distribution or stopped.

Creators who understand this shift from celebrating or lamenting numbers to diagnosing what numbers reveal about algorithmic interpretation. Watch time isn't a score to maximize it's a signal that communicates something about viewer expectations, content delivery, and audience-content alignment.

When a video stops expanding, the question isn't "was my watch time too low?" The question is "what did the algorithm infer from my watch time pattern that led it to conclude further distribution wasn't justified?" This reframe converts emotional reaction into analytical thinking.

The system doesn't punish low watch time. It uses watch time as one input among many to predict whether showing content to more people will generate positive outcomes. If the prediction is negative, distribution stops. If positive, distribution continues. Understanding this distinction transforms how creators interpret their analytics and make decisions about future content.

Watch time is diagnostic data. Treat it that way.

Why Are My TikTok Views Not Increasing? Real Reasons & How to Fix It

Why Are My TikTok Views Not Increasing? Real Reasons & How to Fix It

The reason for low TikTok views usually comes down to the video not meeting the performance criteria demanded by the TikTok algorithm in the initial testing phase. The platform shows every video to a small sample of users, and if they don't engage sufficiently — full watch, comment, or share — distribution stops. The problem isn't luck or timing, but the video's construction itself and how the audience responds to it.

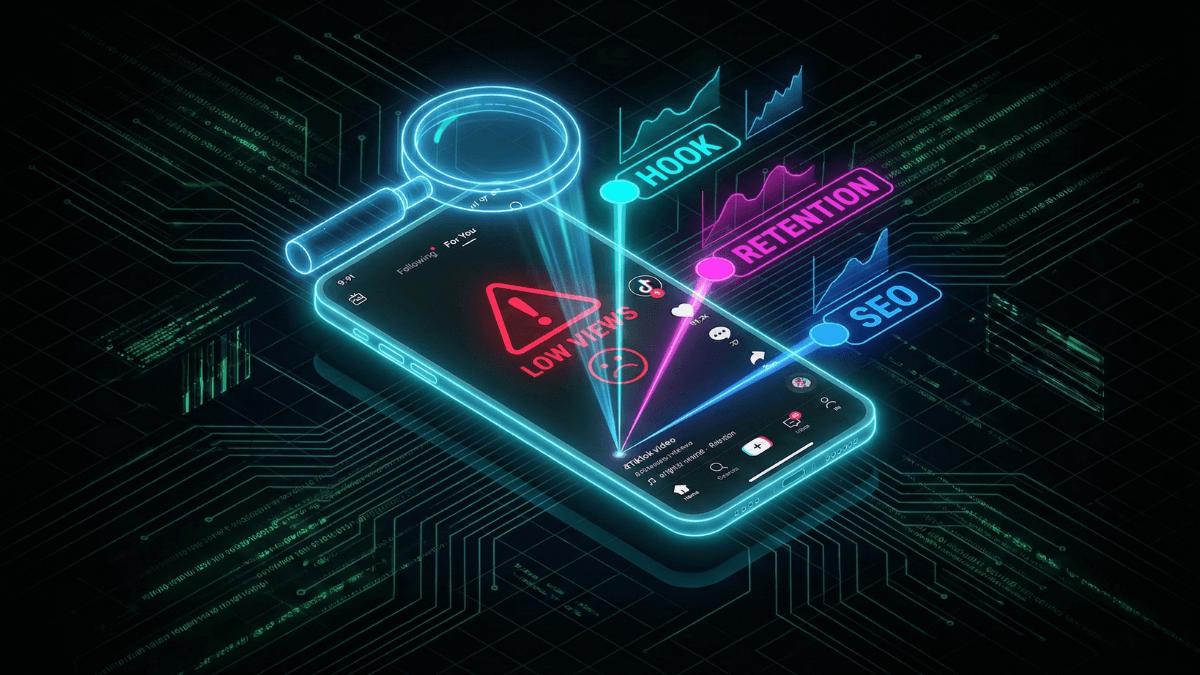
The reason for low TikTok views typically comes down to poor video performance in the initial testing phase, especially the opening and retention rate. When viewers don't engage early, distribution stops automatically.

Quick Diagnosis: Main Reasons for Low Views

  • Unattractive video opening that causes viewers to skip
  • Low retention rate — most viewers stop before the end
  • Unclear idea or scattered content
  • Wrong audience targeting for the content type
  • Inconsistent posting that confuses the algorithm

The Real Reasons Views Don't Increase

Weak Opening

The first two or three seconds of a TikTok video are the only chance to convince the viewer to stay. If the opening is unclear, slow, or doesn't give a reason to continue, the viewer moves to the next video. The TikTok algorithm records this as a negative signal and reduces the video's chances of being shown to a wider audience. TikTok videos that start directly with the main idea achieve significantly higher views than those that start with a long intro or logo.

Low Retention Rate

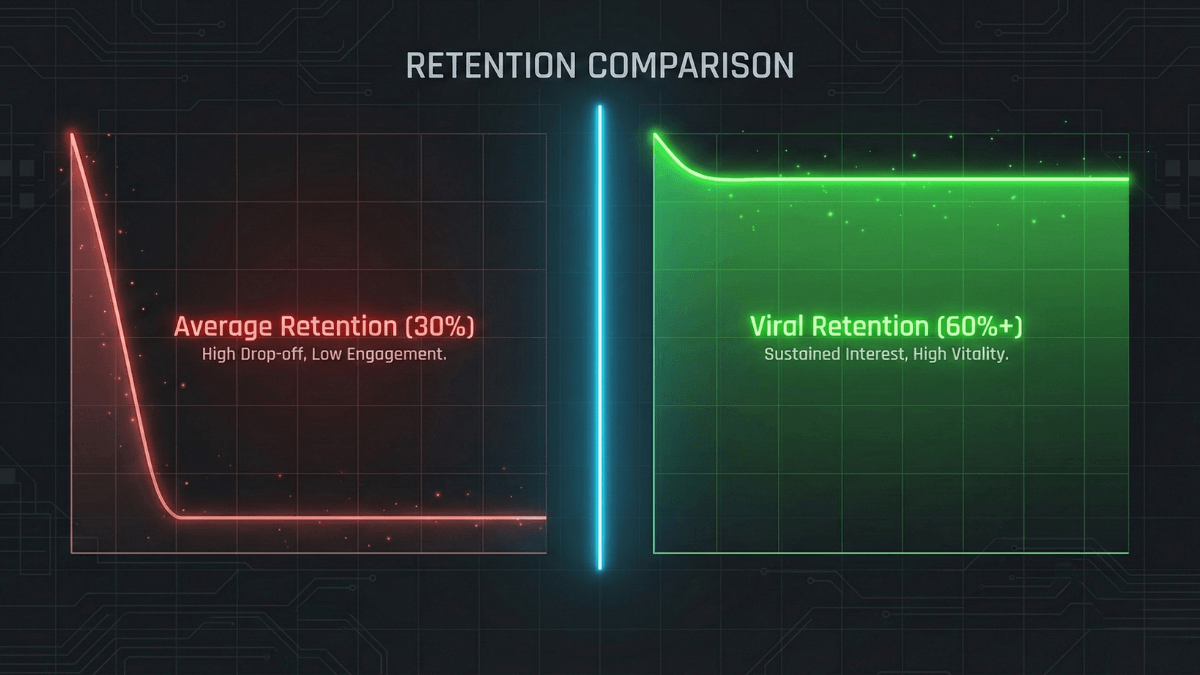
Even if viewers start the video, if most stop in the first half or don't complete it, the algorithm considers the content uninteresting. Retention rate — the percentage who watch the video completely — is one of the most important metrics determining TikTok video distribution. A 15-second video with 80% retention is better than a one-minute video with 30% retention. Learn how to analyze TikTok analytics to increase views by understanding these numbers precisely.

Unclear Idea

If the viewer doesn't understand the video's topic in the first seconds, or if the content is confusing or tries to say more than one thing at once, the video loses its ability to hold attention. Clarity is more important than creativity. A video with one clear idea succeeds more than a video with three intertwined ideas. Using TikTok hooks that increase views at the beginning helps clarify the idea and grab attention.

Wrong Audience

The algorithm initially shows the video to people based on their previous interests. If the content doesn't match the interests of the audience it reached, they won't engage with it. This often happens when the account is new or when content type changes suddenly without gradually building a new audience. Using TikTok hashtags that increase views, specific and related to the content, helps reach the right audience.

Random Posting Without Consistency

Posting intermittently or without any consistent pattern makes it difficult for the TikTok algorithm to understand what type of content you provide and identify the right audience for it. Accounts that post regularly — even just once weekly — build a clearer record for the platform, helping with better targeting. Choosing the best times to post on TikTok to increase views improves initial reach chances.

How Does the TikTok Algorithm Decide Distribution?

The TikTok algorithm doesn't work randomly. When you post a video, the platform first shows it to a small group of users — usually a few hundred. If the video performs well with this group, reach expands to a larger circle. If strong performance continues, expansion continues.

The key metrics the algorithm monitors are: complete watch percentage, number of replays, comments, shares, and saves. These metrics tell the platform the content deserves to reach a wider audience. Views alone aren't enough — engagement is what determines TikTok video distribution.

What to Do to Increase TikTok Views

Review the First Three Seconds

The opening must be clear, fast, and direct. No introductions, no logos, no waiting. Start with the main idea immediately. Use clear text if needed, or a curiosity-provoking question, or a strong visual that forces the viewer to stay. Short educational videos that start directly with the information achieve 40-60% higher retention than those that start with an introduction.

Reduce Video Length

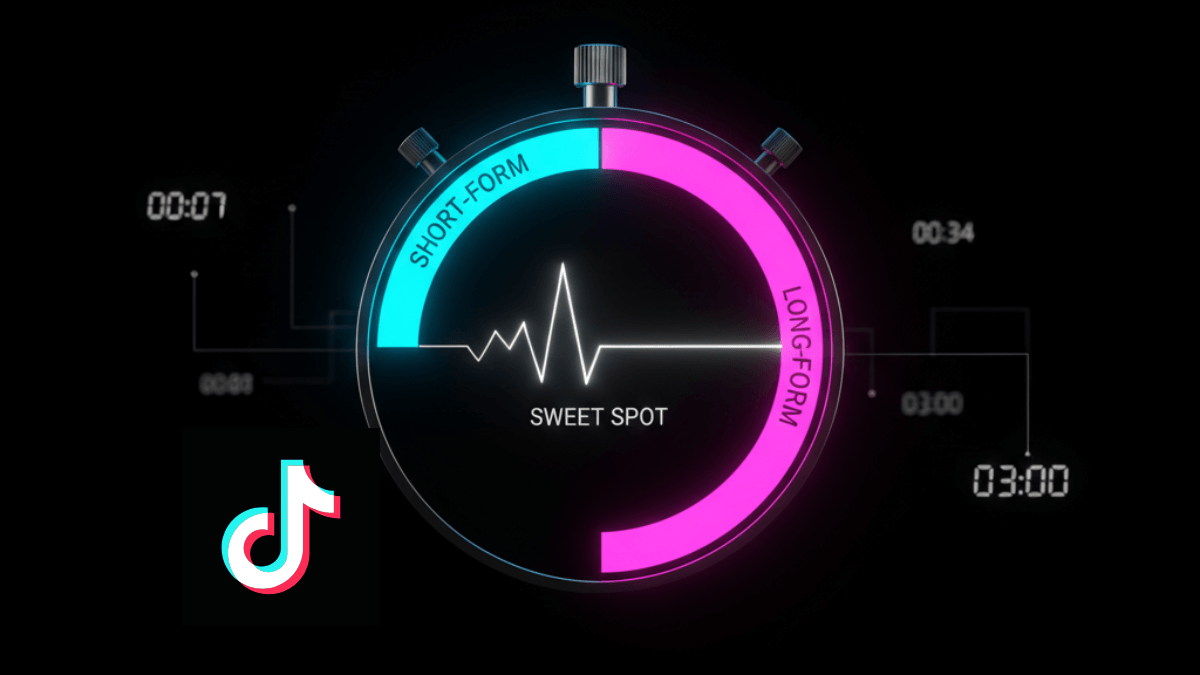
Short videos — between 7 and 20 seconds — usually achieve higher retention rates than long videos on TikTok. If you can deliver the idea in 15 seconds, there's no need for 60 seconds. Every additional second is a chance to lose the viewer and decrease views.

Delete Dead Moments

Review the video before posting and delete any moment that doesn't add direct value. Pauses, silence, slow transition shots — all this lowers retention rate and causes weak views. The video should move quickly from one point to another without stopping.

Test Different Content Types

If you're posting the same type of videos without results, try something different. Change the angle, topic, style, or even presentation method. Watch analytics to see which type performs better, then focus on it.

Post Regularly

Regular posting — even just once every few days — is better than posting daily then stopping for a week. Consistency helps the TikTok algorithm understand the content and identify the right audience, preventing sudden view drops. For maximum impact, consider posting at strategic times when your audience is most active.

Common Mistakes That Prevent Distribution

Using copyrighted music or sounds. Some audio clips are prohibited or have restrictions, reducing the video's chances of appearing. Use popular sounds on the platform or original audio.

Writing long or unclear descriptions. The description should be brief and direct. Excessive or generic hashtags don't help. Use 2-3 specific hashtags relevant to the content.

Ignoring analytics. If you don't look at analytics after each video, you won't know what works and what doesn't. Review where people stopped watching, where they came from, and what percentage completed the video.

Copying others literally. Seeing a successful trend doesn't mean copying it will work for you. A trend needs adaptation to your style and audience. Literal copying makes you one of thousands of similar accounts.

Quick Questions

Does follower count matter for increasing views?
No. Every TikTok video starts from zero. An account with 100 followers can get 100,000 views if performance is strong. The reverse is also true.

How long does a video need to start spreading?
Most TikTok videos get most of their views in the first 24-48 hours. If nothing happens after 72 hours, the video probably won't spread.

Do hashtags increase views?
Specific hashtags might help with initial targeting, but they don't guarantee distribution. Performance is what determines reach, not hashtags.

Conclusion

TikTok views don't increase because the video doesn't pass the initial performance test conducted by the TikTok algorithm. Weak opening, low retention rate, and unclear idea are the main reasons for low views or their cessation. The solution isn't posting more, but improving content quality and understanding what the algorithm looks for. Review analytics, improve the opening, shorten length, and delete everything that doesn't add direct value.

How TikTok Distributes Videos: The Sampling Phase & The

How TikTok Distributes Videos: The Sampling Phase & The "200-View Jail" Explained

TikTok decides video distribution based on a weighted evaluation model that combines retention signals, watch time, engagement, and user behavior within staged batches. The decision doesn't rely on a single signal, but on a composite score that determines whether the video deserves expansion or should stop. To understand weight ranking, check out Algorithm Signal Ranking, and to learn about the staged testing mechanism, see How the Algorithm Tests Videos.

What Is a Distribution Decision?

A distribution decision is the process that determines the audience size to which a video will be shown after each testing stage. Each stage produces an approximate numerical score representing performance quality compared to similar videos of the same length and niche.

Approximate Expansion Formula

The decision model can be theoretically simplified as follows:

Distribution Power ≈ (Retention × high weight) + (Watch Time × high weight) + (Engagement × medium weight) − (Skipping × negative weight)

If the score exceeds a certain threshold compared to the average performance in the same category, expansion occurs. If it drops below the threshold, distribution stops.

Decisive Element: Relative Comparison

The algorithm doesn't evaluate videos in isolation. It compares them to videos with:

  • Same duration
  • Same content type
  • Same audience segment

A 30-second video is compared to other 30-second videos, not to a 10-second or 3-minute video. For more on optimal video length, see Ideal Video Length on TikTok.

When Does a Video Expand?

  • Retention above category average - learn how to improve retention rate
  • Performance stability between batches
  • Low skip rate
  • Balanced early engagement

When these conditions are met, the video moves from a small batch to a progressively larger batch. To understand what makes good retention, see What is a Good Retention Rate.

When Does Distribution Stop?

  • Sharp drop in first 3 seconds
  • Performance decline between first and second batch
  • Rising negative signals like Not Interested
  • Retention instability across different segments

In this case, expansion stops even if there's some engagement. For more details on early stopping, check out Why Videos Stop at 200 Views.

Is Engagement Alone Enough?

No. Engagement reinforces the decision but doesn't determine it. A video with 35% retention and 50 comments won't continue. A video with 75% retention and 5 comments may expand strongly.

How Does the Decision Change Over Time?

The decision isn't instantaneous. After each exposure batch, the score is recalculated. Any performance drop may slow or stop expansion. Any sudden improvement (external sharing or increased rewatches) may re-accelerate distribution.

Relationship Between Distribution Decision and Virality Duration

Videos that maintain a high weighted score across multiple batches may continue going viral for 24–72 hours or more. Videos whose scores drop early stop within the first hours.

Illustrative Numerical Example

Video A:

  • 68% retention
  • Average watch time 22 seconds of 30
  • Low skip rate
  • Result: Gradual expansion to 120,000 views

Video B:

  • 41% retention
  • Average watch time 12 seconds of 30
  • High comments
  • Result: Stopped at 3,000 views

Despite high engagement in the second video, low retention reduced the overall score and stopped expansion.

Does Follower Count Factor Into the Decision?

Not as a decisive factor. Followers may affect the first batch, but the final decision depends on behavioral performance.

Frequently Asked Questions

Is the Decision Fully Automated?

Yes, it's done through machine learning models that continuously evaluate performance.

Can a Stopped Video Return to Distribution?

Rarely, if strong new performance signals appear such as external shares or high rewatches.

Does Timing Change the Decision?

Timing may affect the initial sample size, but doesn't change the performance-based decision logic.

Quick Summary

  • Distribution decision depends on a weighted multi-signal score.
  • Retention and watch time are the foundation.
  • Engagement reinforces but doesn't compensate for weak performance.
  • Each exposure batch re-evaluates the video.

Executive Summary

TikTok doesn't decide video distribution based on account popularity or hashtag count, but through a computational model that measures performance quality compared to similar content. If a video maintains high retention and strong watch time across successive batches, expansion continues. If the relative score drops, distribution stops regardless of any superficial signals.

TikTok Effects & Filters Guide 2026: Top 50 Professional Effects to Boost Views

TikTok Effects & Filters Guide 2026: Top 50 Professional Effects to Boost Views

Did you know that videos using trending Filters and Effects get 4.8 times more views than regular videos? And that 73% of viral TikTok videos use visual effects? Effects and filters aren't just for beautification - they're powerful tools to increase engagement, grab attention, and appear on the For You Page! The shocking truth: most creators use the same 10 filters, while there are over 10,000 free Effects waiting to be discovered! In this comprehensive guide, you'll discover the top 50 trending effects and filters in 2026, how to use them professionally, how to create custom filters, and secrets to choosing Effects that multiply your views 10x!

To understand how effects work with the TikTok algorithm, check out our TikTok Algorithm Guide 2026. For more content strategies, see Viral Content Strategy.

Types of TikTok Effects 💄 Beauty Filters Skin Smoothing Eye Enhancement Teeth Whitening Face Slimming Most Popular 🎭 AR Effects 3D Masks Background Change Virtual Objects Face Tracking For Creativity 🎨 Color Filters Vintage Cinematic Black & White Warm/Cool Tones For Mood ⚡ Interactive Mini Games Quizzes Age Detection Challenges Most Viral

What Are TikTok Effects and Filters?

🎭 The Difference Between Effects & Filters

Many people confuse the terms, but there's a clear difference:

Filters: Visual adjustments applied to the entire video to change colors, lighting, or overall mood. Examples: Vintage, Cinematic, or Black & White filters.

Effects: AR (Augmented Reality) interactive technologies that add dynamic elements like: face masks, background changes, 3D objects, or interactive games.

Why Are Effects and Filters Important?

  • Enhance Video Quality: Improve video appearance professionally without expensive equipment
  • Grab Attention: Unique effects make viewers stop scrolling
  • Ride Trends: Using popular effects increases FYP visibility
  • Boost Creativity: Unlimited possibilities for artistic expression
  • Improve Engagement: Interactive effects encourage viewer interaction

📊 Important Statistics:

  • 🔥 4.8x more views: Videos with trending Effects
  • 💡 73%: Of viral videos use effects
  • +320% engagement: For interactive effects (games, quizzes)
  • 🎨 10,000+: Free effects available on TikTok
  • 📈 200+ new Effects: Added monthly

Types of Effects: Beauty, AR, Color, Interactive

💄 Beauty Filters

Most popular and widely used - enhance facial appearance and skin.

Popular Beauty Filters:

  1. Skin Smoothing: Hides imperfections and gives smooth skin
  2. Eye Enlargement: Makes eyes bigger and more attractive
  3. Face Slimming: Makes face appear slimmer
  4. Teeth Whitening: Bright white teeth
  5. Glow: Adds natural radiance to skin

When to Use: Vlogs, personal content, educational, or any video showing your face clearly.

⚠️ Warning: Don't overdo it! Excessive use looks unnatural and reduces credibility.

🎭 Augmented Reality (AR) Effects

Advanced technologies that add virtual elements to real video.

Types of AR Effects:

  1. Face Masks: Change your appearance completely - animals, characters, artistic makeup
  2. Background Replacement: Virtual Green Screen without equipment
  3. 3D Objects: Add interactive elements that move with you
  4. Face Distortion: Comedic funny effects
  5. Aging/Gender Swap: See yourself in the future or different gender

When to Use: Comedy content, challenges, entertainment, or when you want something completely different.

🎨 Color Filters

Adjust colors and lighting to create a specific mood or aesthetic.

Main Categories:

  1. Vintage/Retro: Old film look - warm and nostalgic
  2. Cinematic: Professional cinematic style - rich colors and high contrast
  3. Black & White: Classic monochrome - for focus and depth
  4. Neon/Vibrant: Bright neon colors - for parties and high energy
  5. Pastel: Soft calm colors - for quiet aesthetic content
  6. Warm/Cool Tones: Warm (orange/yellow) or cool (blue/green)

When to Use: Based on mood and message. Warm for happiness, Cool for calm, Vintage for nostalgia.

⚡ Interactive Effects

Effects requiring user interaction - most viral!

Popular Examples:

  1. Mini Games: Simple games viewers can play
  2. Quizzes & Tests: "What's your personality?", "What's your real age?"
  3. Which Character: "You are from..."
  4. Challenges: "Can you catch the ball?"
  5. Predictions: "What will happen in your future?"

Why Viral: Encourage sharing and recreation - everyone wants to try and share results!

How to Use Effects and Filters Step-by-Step

📱 Quick Method (While Recording)

  1. Open TikTok: Tap "+" button at bottom
  2. Tap "Effects": Icon to the left of record button
  3. Browse Categories:
    • 🔥 Trending - Most popular now
    • 😊 Interactive - Interactive effects
    • 💄 Beauty - Beauty filters
    • 🎭 Funny - Comedy effects
    • 🌍 World - Backgrounds
    • 📱 New - Recently added
  4. Select Effect: Tap to preview
  5. Save Favorites: Tap 🔖 to save for later
  6. Start Recording: Press red record button

🔍 Search for Specific Effect

  1. In Effects screen, tap 🔍 at top
  2. Search by effect name or type
  3. Or search by Creator name

📌 Use Effect from a Video You Watched

  1. Watch a video using desired effect
  2. Tap effect name (appears on left side during video)
  3. Opens effect page
  4. Tap "Use this effect" or "Bookmark" to save

⚙️ Adjust Effect Strength

Some effects (especially Beauty filters) allow intensity adjustment:

  1. Select effect
  2. Look for slider or settings
  3. Drag to increase or decrease strength
  4. Find perfect balance - natural but enhanced

Top 50 Trending Effects and Filters in 2026

🔥 Top 10 - Most Viral Currently

  1. Bold Glamour: Ultra-realistic beautification without exaggeration - 890K uses/day
  2. Green Screen: Change background easily - 1.2M uses/day
  3. Time Warp: Amazing time effects - 650K uses/day
  4. Shapeshifting: Quick transformation between characters - 780K uses/day
  5. Reverse Reality: Reality reversal impressively - 520K uses/day
  6. Anime Filter: Transform to anime character - 950K uses/day
  7. Age Challenge: See yourself old or young - 1.1M uses/day
  8. Golden Hour: Magical golden lighting - 430K uses/day
  9. Cinematic Mode: Professional cinematic look - 580K uses/day
  10. Bling Effect: Sparkle and shine on face and background - 720K uses/day

💄 Top 10 Beauty Filters

  1. Natural Glow: Natural radiance without exaggeration
  2. Soft Focus: Professional skin smoothing
  3. HD Beauty: High clarity with precise enhancements
  4. Fresh Face: Refreshed and vibrant appearance
  5. Dewy Skin: Dewy, moisturized skin
  6. Matte Finish: Matte skin without shine
  7. Peachy Glow: Warm peachy glow
  8. Portrait Pro: For professional portraits
  9. Selfie Perfect: Optimized specifically for selfies
  10. No Makeup Look: Natural no-makeup appearance

🎭 Top 10 Creative AR Effects

  1. Cartoon Face: Transform to cartoon character
  2. Pixel Art: Classic 8-bit game appearance
  3. Clone Effect: Clone yourself in video
  4. Levitation: Float in the air
  5. Face Swap: Swap faces between two people
  6. Hologram: Futuristic holographic appearance
  7. Mirror Effect: Amazing mirror reflection
  8. Glitch Art: Artistic glitch effects
  9. Neon Outline: Neon lines around your body
  10. Virtual Studio: Complete virtual studio

🎨 Top 10 Color Filters for Every Mood

  1. Vintage 90s: Classic 90s look
  2. Film Noir: Dramatic black and white
  3. Sunset Vibes: Warm sunset colors
  4. Ocean Blue: Calm blue tones
  5. Desert Dreams: Earthy desert colors
  6. Neon Nights: Urban night neon
  7. Pastel Paradise: Soft calm pastel
  8. Moody Dark: Dark and mysterious
  9. Bright & Airy: Light and bright
  10. Cyberpunk: Futuristic with saturated colors

⚡ Top 10 Interactive Effects

  1. Which Disney Character: Which Disney character are you?
  2. Celebrity Look-alike: Which celebrity do you resemble?
  3. Fortune Teller: Know your fortune today
  4. True Age Test: What's your real age?
  5. Catch the Ball: Ball catching challenge
  6. What's Your Vibe: What's your energy today?
  7. 2026 Predictions: New year predictions
  8. Red Flag Test: How many red flags do you have?
  9. Friendship Meter: Measure friendship with your friend
  10. Which Country: Which country suits you?

🔍 Strategies to Discover Trending Effects Early

1️⃣ Use "Trending" Tab in Effects

The easiest and clearest method:

  1. Open Effects gallery
  2. Go to 🔥 "Trending" tab
  3. Effects here are sorted by current popularity
  4. Updates daily - check every morning

2️⃣ Monitor For You Page Smartly

Your FYP is a goldmine for trending effects:

  • When you see video using interesting effect
  • Tap effect name on screen
  • Check usage count - if rapidly increasing = rising trend
  • Save immediately before it becomes oversaturated

3️⃣ Follow TikTok Effect Creators

Effect creators often publish new effects before they go viral:

  • Find Top Effect Creators in your niche
  • Enable notifications for their accounts
  • When they publish new effect, be among first users

4️⃣ Use Effect House Browser

TikTok Effect House - effect creation platform:

  1. Visit Effect House website
  2. Browse "Recently Added"
  3. Find effects not yet viral
  4. Try before competitors

5️⃣ Join TikTok Creator Groups

On Facebook, Discord, or Telegram:

  • Creators share latest discoveries
  • Get tips on emerging effects
  • Learn from others' experiences

6️⃣ Analyze Competitors

Track big accounts in your niche:

  1. Make list of 10-15 top creators in your field
  2. Review their new videos daily
  3. Notice any new effects they use
  4. Use quickly before becoming mainstream

⏰ Perfect Timing

Effect Stage Usage Count Recommendation
🌱 Very New < 10K Risky - may not go viral
🚀 Rising 10K - 100K ✅ Perfect - use now!
🔥 Trending 100K - 1M ✅ Good - still effective
📈 Peak 1M - 5M ⚠️ High competition
📉 Declining > 5M ❌ Too late - find new

How to Choose the Right Effect for Your Content

🎯 Basic Criteria

1. Niche Alignment

Not every effect suits every content type:

Content Type Best Effects
💄 Beauty & Fashion Beauty filters, Glow effects, Color grading
😂 Comedy & Entertainment AR face masks, Funny distortions, Interactive games
📚 Educational Minimal filters, Green screen, Text effects
🍳 Food & Cooking Warm color filters, Appetizing tones, Close-up enhance
💪 Fitness Energetic effects, Before/after, Body tracking
🎵 Music & Dance Rhythm effects, Neon, Dynamic backgrounds

2. Available Lighting

Some effects need good lighting to work properly:

  • Strong Lighting: Complex AR effects, Precise face tracking
  • ⚠️ Medium Lighting: Beauty filters, Most color filters
  • Weak Lighting: Use Glow effects or Dark/Moody filters

3. Message and Mood

Effect should support message, not distract from it:

  • 💡 Serious Content: Simple filters or no effects
  • 🎉 Fun Content: Colorful cheerful AR effects
  • 😢 Emotional Content: Calm color filters, Black & White
  • Energy Content: Neon, Vibrant colors, Dynamic effects

4. Trend vs Originality

Using Trending Effect:

  • ✅ Increases FYP visibility chances
  • ✅ Viewers recognize and like it
  • ❌ Very high competition
  • ❌ Your content may look "ordinary"

Using New/Rare Effect:

  • ✅ Your content stands out and looks unique
  • ✅ Less competition
  • ❌ May not attract enough attention
  • ❌ Risk it won't go viral

Perfect Solution: 70% trending effects + 30% new/unique

How to Create Your Own Custom Filter

🛠️ Using TikTok Effect House

Effect House is TikTok's official tool for creating custom AR effects.

Basic Steps:

  1. Download and Install:
    • Visit official Effect House website
    • Download program (available for Windows & Mac)
    • Install and open program
  2. Choose Template:
    • Start with ready-made template for beginners
    • Examples: Face Mask, Color Filter, Screen Effect
  3. Customize:
    • Change colors, images, shapes
    • Add animations
    • Adjust parameters
  4. Test:
    • Use "Preview" to try effect live
    • Test on different faces and lighting
  5. Publish:
    • When satisfied, click "Publish"
    • Fill effect details (name, description, category)
    • Submit for review
  6. After Approval:
    • Your effect appears in TikTok Effects
    • You (and anyone) can use it
    • Track statistics: how many used it

💡 Custom Effect Ideas:

  • 🏢 Brand Filter: Effect specific to your brand
  • 🎨 Signature Style: Color filter that distinguishes your content
  • 🎮 Interactive Game: Simple game related to your niche
  • 📍 Location-based: Effect specific to city or event
  • 🎭 Character Mask: Character mask specific to you or channel

⚠️ Effect House Requirements:

  • 💻 Computer (not mobile)
  • 🎨 Basic design knowledge (helpful but not necessary)
  • ⏱️ Time to learn - powerful tools but need practice
  • 🔍 Patience - review may take 3-7 days

Strategies for Using Effects to Go Viral

🚀 Proven Strategies

1️⃣ "Early Adopter" Strategy

Be among first users of new effect:

  • ✅ Monitor "Recently Added" daily
  • ✅ Use effect within first 24-72 hours of launch
  • ✅ If it becomes trending later, your video will be among first = bigger exposure

Example: When "Bold Glamour" launched, creators who used it in first two days got 10x normal views.

2️⃣ "Effect Challenge" Strategy

Start challenge related to specific effect:

  1. Choose interactive effect
  2. Create video showing how to use it
  3. Challenge followers: "Use this effect and share result with me!"
  4. Repost best responses

Result: UGC (user-generated content) + increased engagement + wider reach

3️⃣ "Before & After" Strategy

Show dramatic difference:

  • Film same scene without effect, then with effect
  • Use smooth transition between them
  • Caption: "The difference with [effect name] 😱"

Why it works: People love comparisons and dramatic transformations

4️⃣ "Effect Combo" Strategy

Combine multiple effects smartly:

  • Use 2-3 effects in one video
  • Example: Green Screen + Color Filter + Beauty Filter
  • But don't overdo - video must remain clear

Result: Unique eye-catching content

5️⃣ "Tutorial Effect" Strategy

Teach audience how to use complex effect:

  1. Choose trending but slightly complex effect
  2. Create quick tutorial (15-30 seconds)
  3. Explain steps clearly
  4. Caption: "How to use [effect] correctly 💡"

Benefit: Build authority + attract followers seeking information

10 Common Mistakes with Effects

❌ Mistakes That Ruin Content Quality

Mistake #1: Overdoing Beauty Filters

Problem: Using beauty filters at 100% strength makes appearance completely unnatural - "plastic" face.

Solution: Adjust strength to 30-50%. Goal: natural enhancement, not complete change.

Mistake #2: Using Outdated Effects

Problem: Using effects that were trending 6 months ago - makes content look old.

Solution: Follow Trending Effects constantly, update effect library monthly.

Mistake #3: Effect Doesn't Match Content

Problem: Using comedic effect in serious video, or vice versa.

Solution: Choose effect based on mood and message - consistency matters!

Mistake #4: Poor Lighting

Problem: AR effects don't work well in weak lighting - appear glitchy.

Solution: Film in good lighting, or use effects that don't require high lighting.

Mistake #5: Ignoring Effect in Caption

Problem: Not mentioning effect name in Caption.

Solution: Mention effect - helps with Searchability and appearing on effect page.

Mistake #6: Not Testing Effect First

Problem: Filming entire video then discovering effect doesn't work well.

Solution: Test effect 5-10 seconds first to ensure result.

Mistake #7: Using Conflicting Effects

Problem: Combining effects that don't match - chaotic result.

Solution: If using multiple effects, ensure they're consistent in colors and style.

Mistake #8: Applying Effect to Low-Quality Video

Problem: Effects don't fix bad video - Garbage in, garbage out.

Solution: Start with good quality video, then enhance with effects.

Mistake #9: Always Using Same Effect

Problem: All your videos with same filter - boring for viewers.

Solution: Vary! Use 5-7 different effects in rotation.

Mistake #10: Ignoring Effect Credits

Problem: Not giving credit to Effect Creator.

Solution: TikTok adds attribution automatically, but you can mention creator in Caption for professionalism.

Advanced Tips for Professionals

🎓 Level Up Your Effects Skills

1. Use External Editing Apps

Some apps offer stronger effects than TikTok:

  • CapCut: Professional effects + advanced editing
  • InShot: Excellent cinematic filters
  • VSCO: Best color filters for aesthetics
  • Prequel: VFX and artistic effects

Method: Edit video externally, then upload to TikTok.

2. Layer Multiple Effects

For complex content, use multiple layered effects:

  1. Record with Effect #1
  2. Save video
  3. Reopen and add Effect #2
  4. Repeat as needed

Note: Each re-save slightly reduces quality - don't overdo!

3. Learn Effect Timing

Some effects work better with specific timing:

  • Use motion-based effects at action moments
  • Calm filters for quiet moments
  • Transition effects when changing scenes

4. Match Effect to Music

Choose effects that match music rhythm:

  • Glitch effects on beats
  • Color changes on song transitions
  • Interactive effects in chorus

5. Create Effect Presets

Save favorite effects in collections:

  • "Daily Vlogs" collection
  • "Product Reviews" collection
  • "Comedy Sketches" collection

This saves time and maintains consistency.

Frequently Asked Questions About TikTok Effects

Are effects free?

Yes! All built-in TikTok effects are 100% free. Some external apps may be paid.

How do I save a favorite effect?

Tap 🔖 next to effect in Gallery, or save from its page directly.

Why don't some effects appear for me?

Effect may not be available in your region, you need to update app, or effect was removed by creator.

Can I remove effect after recording?

Unfortunately no - effects are applied directly to video. That's why testing first is important.

How many effects can be used in one video?

Technically, one during live recording. But you can layer multiple effects as mentioned above.

Conclusion and Final Tips

🎯 Key Steps for Success with Effects:

  1. Follow Trends: Monitor Trending Effects daily
  2. Experiment Constantly: Test 2-3 new effects weekly
  3. Choose Wisely: Effect should serve content, not distract from it
  4. Don't Overdo: Natural is better than exaggerated
  5. Vary: Don't always use same effect
  6. Learn Effect House: To create custom effects
  7. Watch Lighting: Effects need good lighting
  8. Analyze Performance: Which effects get best results?

📚 Additional Resources:

How to Use TikTok Duets and Stitch Effectively

How to Use TikTok Duets and Stitch Effectively

Did you know that 67% of viral TikTok videos use Duets or Stitch? And that collaborative content gets 3.5 times more engagement than regular videos? Duets and Stitch aren't just app features - they're the most powerful rapid growth tools that most accounts ignore! The shocking truth: major TikTok accounts achieve 40% of their growth through smart Duets and Stitch strategies! In this comprehensive guide, you'll learn how to use these two features professionally to double your views, build relationships with major creators, create viral content, and appear in front of millions of new followers without spending a dollar on ads!

To understand how the TikTok algorithm works with collaborative content, check out our TikTok Algorithm Guide 2026. For more growth strategies, see Follower Growth Strategies.

What Are Duets & Stitch? Core Differences and Uses

🎭 Understanding the Difference Between Duets and Stitch on TikTok

📱 What is the Duets Feature?

Duets is a feature that allows you to create a new video that appears side-by-side with someone else's video. Both videos play simultaneously in sync, creating a "live collaboration" or "split-screen" effect. This feature is ideal for direct interactions, immediate responses, and interactive content.

Key Duets Features: Split screen where your video and the original appear together, shared audio so you can hear and react to the original sound, precise time synchronization, automatic attribution to the original creator, and shared reach appearing to both your followers and the original video's followers.

✂️ What is the Stitch Feature?

Stitch allows you to clip a segment from someone else's video (up to 5 seconds) and use it at the beginning of your own video. This feature is ideal for building on existing ideas, responding to specific points, or adding your personal take on viral content.

Key Stitch Features: Short clip up to 5 seconds from the original video, creative freedom to complete the story your way, ideal for building on existing ideas, clear context starting with the original video then your response, and precise targeting of a specific point.

Duets vs Stitch: Key Differences 🎭 Duets Original Video Your Video Synchronized ✓ Split Screen ✓ Shared Audio ✓ Plays Simultaneously ✓ Great for Dance/Sing ✓ Full Video Length ✂️ Stitch Original (5 seconds) Your Response ✓ 5-Second Clip ✓ Connected Video ✓ Build on Ideas ✓ Great for Explaining ✓ Specific Point Response
Comparison Duets 🎭 Stitch ✂️
Display Method Split screen - side by side Single connected video
Content Length Full video (up to 10 min) Up to 5 seconds only
Interaction Direct and synchronized Response or addition
Best Use Dance, singing, reactions, challenges Discussion, explanation, opinions, educational content

How to Use Duets & Stitch: Step-by-Step Guide

📲 How to Create a Duet on TikTok (2026)

Step 1: Choose the Right Video - Look for a video that aligns with your content and allows for creative interaction. Preferably choose videos with good engagement (10K+ views).

Step 2: Access Duet Options - Tap the share icon (arrow) on the video, then select "Duet" from the menu. If the option doesn't appear, the creator has disabled this feature.

Step 3: Choose the Right Layout - TikTok offers several layouts: Split (most common - videos side by side), React (your video small in corner), Green Screen (your video in front of original as background), and Top-Bottom (one video above the other).

Step 4: Record Your Content - Press the record button and interact with the original video. Ensure good synchronization with the audio or movements. You can stop and re-record multiple times.

Step 5: Add Enhancements - Add Effects or Filters as needed, adjust volume levels between your video and the original, and add Text or Stickers if necessary.

Step 6: Write a Strong Caption - Should include mention of the original creator, quick explanation of what you're doing, call to action, and relevant hashtags.

Step 7: Post at the Right Time - Post within 2-4 hours of the original video if it's new and trending, or during your audience's peak hours.

✂️ How to Create a Stitch on TikTok

Follow the same basic steps, but in Step 3 you'll need to select the perfect clip (5 seconds only) using the timeline. Choose the strongest moment, a question-provoking statement, or a point where you can add value.

15 Proven Strategies for Effective Duets

🚀 Growth Strategies Through Duets

1️⃣ "Authentic Reaction" Strategy

Create a Duet on surprising or emotional videos and record your genuine reaction. Don't watch the video before Duet - record your first reaction. People love natural, unscripted responses, and this creates an emotional connection with viewers.

2️⃣ "Skill vs Skill" Strategy

Create a Duet on videos showcasing a specific skill, and display your own skill in the same field. This strategy is ideal for artists, musicians, chefs, and athletes. Find creators in your niche with similar skill levels and create a Duet showing your different style.

3️⃣ "Open Challenge" Strategy

Create a Duet on popular challenges, or start a new challenge. Choose a currently trending challenge, create a Duet, add a unique twist, and challenge your followers to Duet your video. This increases engagement 200-400% and builds an active community.

4️⃣ "Explain & Clarify" Strategy

Create a Duet on videos containing incomplete or unclear information, and add the explanation. Ideal for educational, tech, business, and health content. Look for videos that pose questions without complete solutions, and provide clear answers.

5️⃣ "Before & After" Strategy

Create a Duet comparing "before" and "after" of the same thing. Examples: artist Duets their old drawing with new one, fitness - progress comparison, interior design before and after renovation. People love transformation stories and emotionally engage with them.

6️⃣ "Harmonize & Sing-Along" Strategy

Create a Duet on songs or musical covers and add your voice. Add harmony to solo singing, play an instrument on a song without music, or add beat to an Acapella song. Look for singers with 50K-500K followers for best engagement.

7️⃣ "Translate & Dub" Strategy

Create a Duet on videos in other languages and translate them for your audience. This delivers valuable content to audiences who don't understand the original language, and allows you to benefit from viral content in other countries.

8️⃣ "Fact-Check & Correct" Strategy

Create a Duet on videos containing incorrect information and correct it respectfully. Be respectful, cite your sources, and acknowledge correct aspects. This builds your reputation as a reliable source of information.

9️⃣ "Visual Q&A" Strategy

Create a Duet on videos asking questions, and answer them visually. Show the solution step-by-step, the tool used, or the required location. People learn better by watching.

🔟 "Series Content" Strategy

Create a series of connected Duets. Each video completes the other and references the previous while promising the next. This builds anticipation and drives people to follow your account.

1️⃣1️⃣ "Trend Hijacking" Strategy

Create a quick Duet on the first video starting a new trend, before it becomes oversaturated. The earlier your Duet, the better your chance of appearing alongside the original video when it explodes.

1️⃣2️⃣ "Duet Chain" Strategy

Create a Duet on another Duet to create an interconnected chain. This creates a domino effect where each person brings their followers, and the video becomes a community event.

1️⃣3️⃣ "Paid Collaboration" Strategy

Use Duets to collaborate with brands. Create a professional Duet on a brand video, show how you use their product creatively, then contact them to offer your services. Fee rates: $50-500 per Duet.

1️⃣4️⃣ "Nostalgia Duets" Strategy

Create a Duet on old videos and compare them to the present. People love nostalgia and emotionally engage with content that reminds them of the past.

1️⃣5️⃣ "Expert Commentary" Strategy

Provide expert analysis on videos in your field. Ideal for fitness trainers, health specialists, business experts, and critics. Point out important details and comment with your expertise to build authority in your niche.

Professional Stitch Strategies for Rapid Growth

✂️ How to Use Stitch to Build a Massive Audience

🎯 "Smart Response" Strategy

Use Stitch to respond to questions or discussions. Look for videos asking open questions, use Stitch on the question, and provide a clear, concise answer in 15-30 seconds.

💡 "Missing Context" Strategy

When a video goes viral but lacks information, use Stitch to add it. Example: video shows a life hack, you clarify when it works and when it doesn't.

🔥 "Full Story Reveal" Strategy

Use Stitch to reveal "the rest of the story". When a video shows only results, explain the complete journey, difficulties, and lessons learned.

⚡ "Quick Trend Response" Strategy

Create a quick Stitch on the first trending video before it becomes oversaturated. Monitor For You Page constantly and create Stitch within 1-3 hours of the trend appearing.

📚 "ELI5 - Explain Like I'm 5" Strategy

Use Stitch to explain complex concepts in very simple terms. Ideal for tech, finance, science, law, and medicine. Use analogies from everyday life.

🎬 "React + Analyze" Strategy

Mix emotional reaction with logical analysis. Ideal structure: Stitch (5 seconds) + reaction (5-10 seconds) + analysis (15-25 seconds) + conclusion (5-10 seconds).

50 Creative Ideas for Duets & Stitch

🎨 Art & Creativity Niche (10 Ideas):

  1. Drawing vs drawing - same subject, different styles
  2. Explain technique used in artist's video
  3. Draw same thing at 3 levels: beginner, intermediate, expert
  4. Add missing step in art tutorial
  5. Synchronized drawing time-lapse
  6. Constructive, positive critique of artwork
  7. Speed challenge in drawing
  8. Explain artist's tools used
  9. Digital art vs traditional art
  10. Story behind the artwork

🎵 Music Niche (10 Ideas):

  1. Add harmony to solo song
  2. Explain chord progression
  3. Play same song with different instruments
  4. Analyze specific singer's technique
  5. Beatbox on rap or singing
  6. Explain complex lyrics
  7. Cover in completely different style
  8. Story of song creation
  9. Vocal range competition
  10. Tips for beginners

💪 Fitness & Health Niche (10 Ideas):

  1. Same exercise with different modifications
  2. Correct wrong form
  3. Push-ups or Planks challenge
  4. Explain target muscles
  5. Before/After transformation
  6. Additional nutrition tips
  7. Compare correct vs incorrect technique
  8. Explain importance of warm-up
  9. Home workout vs gym exercise
  10. Common diet mistakes

🍳 Cooking Niche (10 Ideas):

  1. Same recipe in healthy version
  2. Add missing secret ingredient
  3. Cook with different budgets
  4. Explain correct technique
  5. Speed preparation competition
  6. Storage tips
  7. Same recipe in different cuisines
  8. Explain substitute for rare ingredient
  9. Taste test challenge
  10. Origin story of dish

💼 Business & Marketing Niche (10 Ideas):

  1. Analyze marketing strategy
  2. Respond to pitch with improvements
  3. Explain psychology behind successful ad
  4. Case study: success vs failure
  5. Add missing step in business plan
  6. Strategy discussion
  7. Correct common mistake
  8. Brainstorming session
  9. Explain metrics
  10. Interview entrepreneur

Techniques to Make Duets & Stitch Go Viral

🚀 The Viral Formula

The Magic Equation: Viral Duet/Stitch = (High Value + Perfect Timing + Strong Hook + Clear CTA) × Shareability

Formula Elements:

1. High Value: Teach something new, make them laugh, make them think, or show something unexpected. Rule: Viewer should feel they gained something from 30 seconds.

2. Perfect Timing: Post within 1-4 hours of original video if trending. Tuesday-Thursday have highest engagement. Use Analytics to know your audience's peak times.

3. Strong Hook: First 3 seconds are crucial! Start with a bold statement, ask a question, promise value, or create curiosity. Examples: "Wait... this is wrong!", "@username forgot the most important step!".

4. Clear CTA: "Like if you agree", "Comment if this happened to you", "Share with a friend", "Follow for more...", "Duet with me!".

5. Shareability: Ask yourself "Why would someone share this video?" - because it's educational, funny, inspiring, sparks discussion, or amazing.

✅ Pre-Post Checklist:

  • Do first 1-3 seconds grab attention immediately?
  • Does video provide clear value?
  • Is audio clear and audible?
  • Is caption carefully written with mention?
  • Did you use 3-5 relevant hashtags?
  • Is CTA clear at video end?
  • Does video respect original creator?
  • Is screen layout appropriate?
  • Is video duration 15-60 seconds?
  • Is timing appropriate?

How to Choose the Right Videos for Collaboration

🎯 Ideal Video Selection Criteria

1. High Engagement Rate

Formula: Engagement Rate = (Likes + Comments + Shares) ÷ Views × 100

  • Excellent: 8%+ (first choice)
  • Good: 5-8%
  • Average: 3-5%
  • Poor: Below 3% (avoid)

2. Niche Alignment

Video should be in your niche or very close. Same niche is always the best choice, followed by intersecting niche with shared audience.

3. Appropriate Account Size

Golden Rule: Choose accounts 2-10 times larger than yours (not 100 times!)

  • 0-1K → target 2K-10K
  • 1K-10K → target 10K-100K
  • 10K-50K → target 50K-500K
  • 50K+ → you can target 100K-1M+

4. Content Type

Best types for Duets/Stitch: Tutorials, Challenges, Q&A, Trending sounds, Controversial takes. Avoid: Personal vlogs and Highly edited productions.

5. Timing

  • Fresh (0-6 hours): Best for quick trends, high competition
  • Active (1-3 days): Still getting views, less competition
  • Old (week+): No competition, lower reach, ideal for Nostalgia

Duets & Stitch Etiquette: Unwritten Rules

🤝 Basic Respect Rules

1. Always Mention and Thank Original Creator

Use @ mention in Caption, thank them at video beginning or end, and acknowledge credit in comments. Don't claim the entire idea is yours.

2. Don't Steal the Spotlight

Don't make your video overshadow the original, don't be excessively louder, don't use heavy effects. Goal: add value, not eclipse the original creator.

3. Respect Privacy Settings

If someone disables Duets/Stitch, respect their decision. Don't try to bypass it. If someone asks you to delete a Duet/Stitch, delete it immediately.

4. Don't Use Duets/Stitch for Bullying

Don't create Duet/Stitch to mock, ridicule, or embarrass. This violates Community Guidelines and can lead to account suspension.

5. Add Real Value

Every Duet/Stitch should add something: new information, different angle, entertainment, or improvement. Don't create Duet/Stitch just for Exposure.

6. Respect Intellectual Property

Don't use Duets/Stitch to steal ideas or recycle content without adding value. Provide a unique perspective.

7. Engage with Comments

When you create a Duet/Stitch, monitor original video comments and engage with people there. This builds visibility and attracts new followers.

8. Respond to Duets on Your Videos

If someone creates a Duet on your video, appreciate it! Respond in comments, share on story, or create a Duet on their Duet.

10 Fatal Mistakes That Ruin Your Duets & Stitch

❌ Common Mistakes Everyone Makes

Mistake #1: Choosing Random Videos

Mistake: Creating Duet/Stitch on any video without planning.

Solution: Choose videos strategically: high engagement, aligned niche, appropriate account size.

Mistake #2: Weak Hook

Mistake: Boring opening: "Hey guys, today we're going to..."

Solution: Start strong: "Wait! This is wrong!", "Look at the difference...", "I'll teach you the secret..."

Mistake #3: Unbalanced Audio

Mistake: Your voice much louder than original video or vice versa.

Solution: Adjust audio level in settings. Test balance before posting.

Mistake #4: Forgetting Mention

Mistake: Not mentioning original creator in Caption.

Solution: Always use @username in Caption and in video itself.

Mistake #5: Too Long Content

Mistake: Duet/Stitch lasting two minutes or more.

Solution: Keep it brief: 15-45 seconds for best results. Each extra second = higher drop-off.

Mistake #6: Not Adding Value

Mistake: Just reposting original video without addition.

Solution: Ask yourself: "What new am I offering?" If no answer, don't post.

Mistake #7: Wrong Layout

Mistake: Using layout that hides important elements from original video.

Solution: Try all layouts and choose most suitable. Usually Split or React are best.

Mistake #8: Too Long Stitch Clip

Mistake: Always using full 5 seconds.

Solution: Use only what you need (2-4 seconds often sufficient). Be precise in clip selection.

Mistake #9: Neglecting Hashtags

Mistake: Posting without hashtags or using only general hashtags.

Solution: Use mix: niche hashtags + #duet/#stitch + trending hashtags.

Mistake #10: No Follow-Up

Mistake: Posting one Duet/Stitch then stopping.

Solution: Make it ongoing strategy: 3-5 Duets/Stitch weekly for sustained growth.

Privacy Settings: Allow or Disable?

⚙️ How to Manage Duets & Stitch Settings for Your Account

Access Settings:

  1. Go to Profile
  2. Tap menu (three lines) at top
  3. Choose "Settings and privacy"
  4. Go to "Privacy"
  5. Select "Duet" or "Stitch"

Setting Options:

  • Everyone: Anyone can create Duet/Stitch on your videos
  • Friends: Only mutual friends
  • Off: No one can create Duet/Stitch

When to Allow Duets/Stitch?

Allow if: You want to increase reach, build community, encourage user-generated content, or your content is educational/entertainment.

Disable if: Sensitive or personal content, exclusive commercial content, or you fear misuse.

Recommendation: Allow generally, but monitor what's posted. You can always request removal of inappropriate Duet/Stitch.

Control Per Video:

You can change Duet/Stitch settings for each video individually:

  1. Before posting, tap "Who can Duet/Stitch"
  2. Choose appropriate setting for this video
  3. Post

How to Analyze Duets & Stitch Performance

📊 Key Performance Indicators (KPIs)

1. Completion Rate

Percentage of viewers who watched entire video. Goal: 40%+ for Duets/Stitch.

2. Engagement Rate

Calculation: (Likes + Comments + Shares + Saves) ÷ Views × 100. Goal: 6%+ excellent.

3. Share Rate

Shares ÷ Views × 100. Goal: 2%+ means strong viral content.

4. Follower Growth

How many new followers came from this Duet/Stitch? Track in first 24-48 hours.

5. Profile Click Rate

How many people clicked your profile after watching Duet/Stitch? Goal: 3-5%.

🔍 How to Track These Metrics:

  1. Open published video
  2. Tap "..." (three dots)
  3. Choose "Analytics"
  4. View: Total views, Average watch time, Engagement, Traffic source
  5. Compare Duets/Stitch performance to your regular videos

📈 What to Do With Data?

  • If Engagement high: Repeat same type of Duets/Stitch
  • If Watch time low: Shorten video, improve Hook
  • If Shares few: Content isn't share-worthy, add more value
  • If Profile clicks low: Improve CTA at video end

Advanced Strategies for Complete Mastery

🎯 Expert Tactics

1. "Duet Series" Strategy

Create interconnected series of Duets. Example: "Top 10 Dances 2026" - each Duet on different dancer, numbered in series. This encourages viewers to watch entire series.

2. "Reverse Duet" Strategy

Instead of waiting for others to Duet you, you Duet small videos (1K-10K followers). This gives them exposure and encourages them to return the favor.

3. "Stitch Response Chain" Strategy

Create Stitch asking a question or discussion point, then encourage your audience to Stitch their responses. Then, create compilation of best responses.

4. "Cross-Niche Duets" Strategy

Create Duet with niche close to yours (not same). Example: fitness + nutrition, music + dance, art + design. This expands your audience to new segments.

5. "Celebrity Duet Hack" Strategy

Create Duet on celebrities or mega influencers videos, but choose their old videos (no competition). Add unique value, and use their name hashtags.

🔥 The 30-Day Challenge Strategy

Proven Growth Plan - 30 Days Duets/Stitch:

Week Activity Goal
1 5 Duets on 10K-50K accounts Build visibility + learn
2 5 Stitch on current trends Ride trend wave
3 3 Duets on big creators + 3 on small Balance Reach
4 Duet Series (5 parts) Build anticipation

Expected Results After 30 Days: 50-200% increase in followers, 100-300% increase in average views, and built strong network of creators.

Frequently Asked Questions About Duets & Stitch

How often should I use Duets/Stitch?

For rapid growth: 3-5 times weekly. For sustainable growth: 2-3 times weekly. Don't rely on them 100% - mix with your original content.

Do Duets/Stitch affect the algorithm?

Yes! Algorithm loves collaborative content because it increases engagement and watch time. But it must be high quality.

What if the original creator doesn't respond?

This is completely normal. Most creators don't respond to every Duet/Stitch. Important is to benefit from their audience and add value.

How do I prevent bad Duets/Stitch on my videos?

You can't prevent specific Duet/Stitch in advance, but you can disable feature entirely or request removal of any inappropriate Duet/Stitch after posting through Report.

Can I create a Duet on a Duet?

Yes! And it can create a very powerful viral Chain effect.

Conclusion and Final Tips

🎯 Golden Keys to Success:

  • Use Duets/Stitch as part of comprehensive strategy, not magic solution
  • Quality over quantity - one strong Duet better than 10 weak ones
  • Always respect original creators - community remembers
  • Experiment, analyze, improve - no one formula fits all
  • Patience - results come with consistency and continuous improvement

📚 Additional Resources:

TikTok Platform Evolution 2026: Complete Journey from Musical.ly to 1.7 Billion Users

TikTok Platform Evolution 2026: Complete Journey from Musical.ly to 1.7 Billion Users

From an obscure Chinese mobile app with just 1,000 users in 2016, to a digital empire dominating social media with 1.7 billion active users valued at $225 billion! TikTok's incredible story isn't just about technical success—it's a complete cultural revolution that fundamentally changed how we consume content, communicate, and express ourselves online. The shocking truth: TikTok wasn't always "TikTok"! This viral video platform started as Musical.ly, merged in a historic $1 billion deal, survived government ban attempts in 3 major countries, and became the most downloaded app in human history, surpassing Facebook, Instagram, and even WhatsApp! This comprehensive guide reveals the complete journey of the world's fastest-growing social media platform: humble beginnings, pivotal moments, meteoric rise, existential challenges, and what the future holds for this content creation giant that reshaped digital marketing and the creator economy forever!

For a comprehensive understanding of the platform today and how to grow on TikTok, check out our Complete TikTok Marketing Guide. To master the viral content strategy and understand the algorithm secrets, see our TikTok Algorithm Guide 2026.

Before TikTok: The Vine Era and Rise of Short-Form Video Content

Vine: The Pioneer Social Video Platform That Failed

📱 What Was Vine? The Original Short-Form Video App

Vine was a revolutionary short-form video platform (6-second videos) launched by Twitter in 2013. It pioneered the concept of mobile video content creation and helped create an entire generation of famous digital content creators and social media influencers. Vine introduced the world to viral video loops, comedy sketches, and user-generated content that would later define the creator economy.

Year Platform Event Impact on Social Media
2013 Vine App Launch Started the short-form video revolution
2014-2015 Peak User Engagement 200 million active users monthly
2016 Decline Begins Instagram Stories competition hurt growth
2017 Vine Shutdown Announced End of an era in mobile video

💡 Critical Lessons for Social Media Platforms

Why Did Vine Fail? Understanding Platform Sustainability

  • No creator monetization: Twitter offered zero financial incentives for content creators
  • Slow platform updates: Mobile app didn't evolve fast enough with user needs
  • Fierce social media competition: Instagram Stories and Snapchat offered superior features
  • Limited video editing tools: Creation tools remained very basic compared to competitors
  • Influencer migration: Top celebrities and creators moved to monetized platforms

What TikTok Learned About the Creator Economy: Supporting content creators financially through monetization programs = sustainable platform growth and long-term user engagement

✅ What TikTok's Algorithm Inherited from Vine's Video Platform:

  • 📹 Short-form entertaining video content that goes viral quickly
  • 🎭 Focus on comedy content and entertainment value
  • 🌟 Power of young content creators and influencer marketing
  • 🔄 Ability for user-generated content to achieve viral reach organically

Musical.ly Origins: How a Failed Education App Became a Lip-Sync Sensation (2014-2017)

The Birth of Musical.ly: A Social Media Platform Success Story

👥 The Founders Behind the Viral App

  • Alex Zhu - CEO and Co-founder (tech background from SAP, product management expert)
  • Luyu Yang - Technical Co-founder (experienced software engineer and developer)

💡 The Real Origin Story: From Failure to Social Media Success

Original Problem They Tried to Solve: Alex and Luyu wanted to create an educational short-video mobile app for learning!

First Product Failure: The educational video app completely failed to gain user engagement (virtually 0 app downloads and no viral growth)

Pivotal Moment in Social Media History: In summer 2014, Alex Zhu observed teenagers on the San Francisco subway creating lip-sync videos and enjoying music videos on their phones, leading to the breakthrough idea

Bold Business Pivot: Completely transformed the mobile app into a music lip-sync platform specifically targeting Gen Z youth culture and viral video trends

Startup Funding Success: Raised $116.5 million from top venture capital investors including GGV Capital and Qiming Venture Partners, proving the creator economy potential

Explosive User Growth: The Rise of a Social Video Giant in Just 3 Years

Year Active Users Major Platform Event Revenue Growth
2014 Zero → 10K App Launch in China (August) - Initial beta testing Pre-revenue
2015 10 million users US Market Expansion - Viral growth begins ~$1M ARR
2016 90 million MAU #1 Downloaded Free App in USA App Store $50M+ ARR
2017 200+ million MAU ByteDance $1B Acquisition Announced $150M+ ARR

Musical.ly's Pioneer Features That Defined Social Video

Platform Feature Description Impact on User Engagement
🎤 Easy Lip-Sync Technology Simple lip-syncing interface with trending music tracks Made everyone feel like a performer - democratized content creation
✨ AR Filters and Effects Beauty filters and simple video effects Increased user confidence and video production quality
🎭 Duets Feature Collaborate by responding to another creator's video Created viral challenges and massive user interaction
🎵 Massive Music Library Thousands of licensed songs and audio tracks Enabled unlimited content diversity and creativity
🎯 Gen Z Focus User interface and features designed for teenagers Built extremely strong platform loyalty and daily active users

🎯 Why Did Musical.ly Succeed in the Competitive Social Media Market?

  1. Perfect Market Timing: Launched just one year after Vine's shutdown created a gap in short-form video
  2. User Experience Simplicity: Anyone could create viral content in minutes without video editing skills
  3. Youth Culture Understanding: Deep insights into what Gen Z users wanted from a social media platform
  4. Smart Digital Marketing: Heavy investment in influencer marketing and ads on YouTube and Instagram
  5. Viral Content Strategy: Easy to share videos on other social media platforms drove organic growth

TikTok's Birth in China: How Douyin's AI Algorithm Changed Social Media Forever (2016)

📱 ByteDance Enters the Social Media Arena with Revolutionary Technology

Who is ByteDance? The Tech Giant Behind TikTok

ByteDance is a Chinese technology company founded by visionary entrepreneur Zhang Yiming in 2012, now one of the world's most valuable startups in the creator economy space.

Main Product Before TikTok: Toutiao (an AI-powered personalized news app with over 200M+ daily active users in China)

Ambitious Vision for Social Media: Create a global short-form video content platform powered by the world's most advanced artificial intelligence and machine learning algorithm

Company Valuation Today: $225 billion (largest privately-held tech startup globally, competing with Meta and Google)

Douyin Platform Launch in China (September 2016)

Revolutionary Differences from Musical.ly's Social Network Model:

Platform Feature Musical.ly (Social Graph Model) Douyin/TikTok (Interest Graph Model)
Content Focus Lip-sync music videos only All video content types - comedy, education, cooking, sports, news
Algorithm Technology Social Graph (shows content from people you follow) Interest Graph powered by AI (shows content matching your interests)
Target Audience Teenagers aged 13-18 only All demographics ages 13-65+ for maximum reach
Video Content Types Music performance and lip-sync only Diverse: comedy, educational content, cooking, fitness, news, tutorials
Core Technology Simple video editing tools Advanced AI, Machine Learning, computer vision for personalization
Platform Goal Niche lip-sync social platform The future of all digital content consumption and creator monetization

Rocket Success: How TikTok Dominated China's Social Media Market

Amazing User Growth Numbers in First Year of Launch:

  • 📊 100 million monthly active users achieved in just 12 months - unprecedented viral growth
  • 📊 400 million daily active users by end of 2017 in China alone
  • 📊 #1 mobile app in China surpassing even the legendary WeChat super app
  • 📊 45 minutes average session time - highest user engagement in social media
  • 📊 10 billion video views daily in 2017, proving massive content consumption

🔑 The Secret to Viral Success: Revolutionary For You Page Algorithm

TikTok introduced something completely unprecedented in social media: the For You Page (FYP) powered by advanced artificial intelligence and machine learning

How Does the TikTok Algorithm Actually Work?
  • 🧠 AI monitors user behavior: What videos you watch, watch time duration, rewatches, shares, comments for personalization
  • 📊 Continuous machine learning: Every single video interaction improves the algorithm's understanding of your interests
  • 🎯 Individual content personalization: Every user sees a completely different and unique For You Page
  • Equal opportunity for virality: Even brand new accounts with 0 followers can achieve viral reach organically

Revolutionary Result for Digital Marketing: For the first time in social media history, a platform delivers highly personalized content based purely on your demonstrated interests and engagement patterns, not who you follow!

Why Did This Algorithm Strategy Revolutionize Social Media Marketing?

Algorithm Advantage Impact on Platform Growth
No need for large follower count New content creators have equal chance at viral reach - democratized fame
100% personalized content feed Much longer user engagement sessions and higher retention rates
Easy organic talent discovery New influencers and viral stars emerge daily on the platform
Highly addictive content consumption 45+ minutes average daily usage - best in social media industry

Visual Timeline: Complete TikTok Evolution from Musical.ly to Global Giant

TikTok Growth Timeline: From Musical.ly (2014) to 1.7B Users (2026) Visual timeline showing TikTok's evolution including Musical.ly launch 2014, Douyin launch 2016, $1B merger 2017, global expansion 2018, pandemic boom 2020, reaching 1.7 billion users by 2026 TikTok Evolution: From Musical.ly to Global Social Media Giant 2014 Musical.ly App Launch 2016 Douyin Launch (TikTok China) 2017 $1B Merger ByteDance Acquires 2018 Global TikTok Worldwide Launch 2020 Pandemic Boom 1B Users Milestone 2026 Today 1.7B Users $225B Valuation Accelerated Viral Growth ⬆

The Historic $1 Billion Merger: How ByteDance Acquired Musical.ly and Created TikTok (2017-2018)

Global Social Media Domination: TikTok's Expansion Strategy from 500M to 800M Users (2018-2020)

The Pandemic Boom: How COVID-19 Made TikTok the #1 Social Media Platform (2020-2021)

Geopolitical Challenges: Government Bans, Security Concerns, and the India Crisis (2020-2022)

Platform Evolution: How TikTok Became an E-Commerce and Creator Economy Powerhouse (2021-2024)

Major Milestones: Every Record TikTok Broke in Social Media History

Cultural Revolution: How TikTok Changed Music, Marketing, Fame, and Gen Z Culture

TikTok Business Model: How the Platform Makes $20+ Billion Annually

The Future of TikTok: Expert Predictions for 2025-2030

Frequently Asked Questions About TikTok History and Evolution

When was TikTok created and launched?

TikTok was originally created as Douyin in China in September 2016 by ByteDance. The global version "TikTok" launched in August 2018 after ByteDance acquired Musical.ly for $1 billion in November 2017. Musical.ly itself was founded in 2014 by Alex Zhu and Luyu Yang.

How did TikTok become so popular and viral?

TikTok's viral success came from its revolutionary AI-powered For You Page algorithm that personalizes content based on user interests rather than follower count, combined with easy-to-use video creation tools, trending music integration, and perfect timing after Vine's shutdown. The COVID-19 pandemic accelerated growth from 800M to 1 billion users in 2020.

What happened to Musical.ly? Did it become TikTok?

Yes, Musical.ly became TikTok in August 2018. ByteDance acquired Musical.ly for approximately $1 billion in November 2017, then merged it with their Chinese app Douyin to create the global TikTok platform. All Musical.ly users and content were automatically transferred to TikTok.

How many users does TikTok have in 2026?

As of 2026, TikTok has approximately 1.7 billion monthly active users globally, making it one of the largest social media platforms in the world, behind only Facebook and YouTube in total users.

Why was TikTok banned in India?

India banned TikTok in June 2020 citing national security concerns and data privacy issues, amid geopolitical tensions with China. The ban resulted in TikTok losing 200 million users overnight, its largest market loss ever.

How does TikTok make money?

TikTok generates revenue through three main sources: advertising (80% of revenue, approximately $16B in 2025), TikTok Shop e-commerce (15%, ~$3B), and LIVE gifts where users send virtual gifts to creators (5%, ~$1B). Total annual revenue exceeds $20 billion.

📊 The Complete TikTok Success Story: Key Takeaways for Social Media Marketers

From a simple lip-sync mobile app to the world's most powerful short-form video content platform and creator economy!

Essential Lessons Learned from TikTok's Viral Growth:

  • AI-powered personalization algorithm beats traditional social network follower models
  • Creator monetization and support = sustainable platform success and user retention
  • Rapid adaptation and innovation essential for survival in competitive social media
  • Short-form video content is the future of digital marketing and internet consumption
  • Mobile-first user experience and easy content creation tools drive viral adoption

📚 Related Social Media Marketing Resources:

TikTok Account Safety: A Comprehensive Framework for Protection, Recovery, and Trust

TikTok Account Safety: A Comprehensive Framework for Protection, Recovery, and Trust

Account safety on TikTok is not just avoiding obvious violations or using a strong password. It's a multi-layered system that starts with understanding content policies and complying with them, then managing risk signals monitored by the algorithm, leading to protecting the account from hacking and building long-term trust with the platform. Without understanding this system, you may find your account banned or restricted without clear reason, or lose months of effort in a moment. This article builds a complete framework for protecting your account from restrictions and bans, how to deal with problems when they occur, and recovering the account if necessary.

Diagnose Your Account Problem in 60 Seconds

Each problem has specific symptoms and different solution. Accurate diagnosis saves weeks of random attempts.

Views Crashed Suddenly

Indicators: You were getting 10K+ views per video, suddenly last 3-5 videos with 200-500 views only, without change in content quality.

Diagnosis: High probability of Shadowban or temporary distribution restriction.

Solution: Review Shadowban mechanics, then apply precise detection steps.

Video Not Entering FYP

Indicators: Views come only from your followers (90%+ from followers), FYP percentage below 10%, video stops growing within two hours.

Diagnosis: Problem in content quality or risk signals preventing wide distribution.

Solution: Review content risk signals, then explore reasons for non-increasing views.

Account Not Appearing in Search

Indicators: When you search for your exact account name, it doesn't appear in results, or appears very late.

Diagnosis: Search ban, a type of Shadowban targeting search appearance.

Solution: Review search ban and complete Shadowban understanding.

Content Violation Notice

Indicators: You received notice that specific video violates guidelines, may be deleted or restricted.

Diagnosis: Clear violation, may accumulate and lead to ban if repeated.

Solution: Review handling violations, then study content policy guide.

Monetization Feature Disabled

Indicators: Monetization feature was enabled, suddenly disappeared or became locked.

Diagnosis: Violation of monetization policies, or decline in eligibility.

Solution: Review monetization restrictions and recheck eligibility requirements.

Temporary Account Suspension

Indicators: You can't post or comment, notice says "your account is temporarily suspended", specific duration (24 hours, 7 days, etc).

Diagnosis: Moderate violation, temporary penalty.

Solution: Review temporary suspension and wait for duration to end without activity.

Permanent Ban

Indicators: Notice "your account has been permanently banned", you can't log in, or can log in but without any features.

Diagnosis: Serious violation or repeated violations.

Solution: Review banned account recovery, then apply complete recovery steps.

Suspected Account Hack

Indicators: Strange activity (videos you didn't post, messages you didn't send), unable to log in, change in email or phone number.

Diagnosis: Likely security breach.

Solution: Review handling compromise, then apply secure account immediately.

The Six-Layer Safety System

Account safety consists of six cumulative layers. Each layer protects from different type of risk. Neglecting any layer leaves gap that can lead to account loss.

Comprehensive Overview of Layers

Policy Compliance: Understanding what's allowed and what's prohibited according to TikTok guidelines. This layer prevents obvious violations.

Distribution Restrictions: Understanding Shadowban and different distribution restrictions that limit content reach without complete ban.

Account Security: Protecting account from hacking and unauthorized access.

Content Risk Signals: Behavioral patterns that raise algorithm suspicion even if they don't explicitly violate policies.

Recovery Protocols: What to do when problem occurs, and how to recover account or access.

Long-term Account Trust: Building clean record and good reputation with platform that protects you from future restrictions.

Integration Between Layers

Layers work together. For example: policy compliance (layer one) prevents violations, but you may face distribution restrictions (layer two) even without violation if risk signals are high (layer four). Account security (layer three) protects you from hacking that could lead to violations attributed to you.

Layer One: Policy Compliance

Content policies on TikTok are extensive and update regularly. Understanding and complying with them is first line of protection from bans and restrictions.

Basic Policy Categories

Policies divide into clear categories: dangerous content (violence, self-harm, illegal activities), inappropriate content (nudity, sexual content, hate speech), intellectual property violations (copyrighted music, others' videos without permission), platform behavior (spam, manipulation, impersonation).

Complete content policy guide explains each category in detail with clear examples.

Gray Areas

Some content isn't clearly prohibited but "risky". For example: controversial political content, sensitive religious discussions, content about sensitive health topics. This content may not be deleted, but its distribution is restricted (doesn't reach FYP strongly).

Rule: if you're asking "is this allowed?", usually answer is: technically yes, practically will be restricted. Better to avoid unless necessary for your content.

Common Compliance Mistakes

  • Assuming "everyone does it": Seeing content violating policies doesn't mean it's allowed. May not be detected yet, or account on way to ban.
  • Ignoring updates: Policies change. What was allowed 6 months ago may be prohibited now.
  • Relying on "free speech": TikTok is private platform with its rules. Free speech doesn't mean freedom from consequences within platform.

Compliance Measurement Indicators

  • Violation count: Number of violations on account (should be zero)
  • Content removal rate: Percentage of removed content from total posted (should be 0%)
  • Warning frequency: How many times you received warnings in last 90 days (zero = healthy)

Compliance Assurance Steps

  1. Read Community Guidelines completely at least once every 6 months
  2. Before posting any "sensitive" content, search platform: does similar content spread without problems?
  3. Avoid using copyrighted music without license (use TikTok library)
  4. Don't copy others' complete content (even if Duet/Stitch, add value)
  5. Review old videos: delete any content that may be considered violating now

Layer Two: Distribution Restrictions

Distribution restrictions are more dangerous than obvious ban because they're hidden. Your account works, you can post, but nobody sees your content. This is called Shadowban.

Shadowban Mechanics

Shadowban isn't one type. There are levels: light restriction (reducing distribution by 50-70%), moderate restriction (90%+ views from your followers only), complete restriction (video not distributed at all outside followers). Understanding Shadowban deeply explains each type and causes.

Shadowban is usually temporary: 72 hours to 14 days depending on cause. But may extend if behavior causing it continues.

Common Shadowban Causes

  • Posting violating content (even if not deleted)
  • Spam behavior: posting 10+ videos in one hour, mass follow/unfollow
  • Using banned hashtags or ones associated with bad content
  • Multiple reports on your account (even if false)
  • Sudden drastic change in content type

Search Ban

A type of Shadowban targeting your appearance in search results. Your account doesn't appear when someone searches for your name or keywords related to your content. Usually happens because of: spam content, impersonation, suspicious behavior.

Common Mistakes Leading to Shadowban

  • Ignoring early signs: Gradual decline in views you ignore until it collapses completely.
  • Trying to "trick" algorithm: Using external apps to increase followers or likes = almost certain ban.
  • Posting during Shadowban: Continuing to post heavily during Shadowban may extend duration. Better: stop 3-5 days.

Shadowban Detection Indicators

  • FYP percentage drop: Drop in FYP views percentage from 70%+ to below 20%
  • First-hour views collapse: Views in first hour drop 80%+ suddenly
  • Search visibility: Searching for your exact account name doesn't show you in first 10 results

How long views drop lasts clarifies natural vs suspicious timings.

Shadowban Handling Steps

  1. Confirm diagnosis: use precise detection tools
  2. Stop posting for 48-72 hours
  3. Delete last 2-3 videos (may be the cause)
  4. Review used hashtags: search for each hashtag, if not many results appear = banned
  5. After 72 hours, post completely safe content (without suspicious hashtags, educational/positive content)
  6. Monitor performance: if views return gradually = Shadowban ended

Layer Three: Account Security

Hacking can destroy account in minutes. Hacker may post violating content, change account information, delete everything. Preventive protection is much easier than recovery.

Authentication Layers

Basic protection: strong password (12+ characters, numbers, symbols), unique to TikTok (don't use it on other sites). Advanced protection: enable Two-Factor Authentication (2FA) via app like Google Authenticator or Authy. SMS 2FA better than nothing, but app-based is stronger.

Complete account security steps include additional settings like linking email and phone number.

Access Monitoring

Review "Manage devices" in settings monthly. If you see unknown devices, remove them immediately and change password. Review "Login activity": if you see login attempts from strange countries, this is warning.

Phishing Awareness

Most common hacking methods: fake messages claiming to be from TikTok asking for your information, links to fake pages resembling TikTok, "free" offers to increase followers in exchange for your account information.

Golden rule: TikTok will never ask for your password via email or message. Any request = fraud.

Common Security Mistakes

  • Using same password everywhere: If one site is hacked, all your accounts at risk.
  • Sharing login credentials: Giving password to "account manager" or "editor" without necessity = risk.
  • Ignoring 2FA: "Too complicated" isn't excuse. Enabling it takes two minutes and protects years of effort.

Security Measurement Indicators

  • 2FA status: Is it enabled? (should be: yes)
  • Unknown device count: Number of unknown devices in "Manage devices" (should be: zero)
  • Password age: Last time you changed password (should change every 6 months at least)
  • Recovery options: Are email and phone number updated and can you access them?

Account Security Steps

  1. Change password to strong and unique one now
  2. Enable 2FA via Authenticator app
  3. Add/update recovery email and phone number
  4. Review "Manage devices", remove any strange device
  5. Don't open links from strange messages claiming to be TikTok

Layer Four: Content Risk Signals

Some patterns raise algorithm suspicion even if they don't directly violate policies. These signals lead to higher monitoring and precautionary distribution restrictions.

Behavioral Flags

Patterns raising suspicion: very frequent posting (5+ videos daily suddenly after weeks without posting), deleting and reposting same video repeatedly, drastic change in content type (from cooking to tech without transition), using same video with multiple accounts.

Changing niche safely explains how to transition between topics without raising risk signals.

Video Deletion Impact

Does deleting video hurt clarifies that occasional deletion (1-2 videos monthly) doesn't harm. But deleting 10+ videos in one week, or deleting all old videos at once = risk signal. Algorithm interprets it as attempt to hide evidence of violations.

Engagement Manipulation

Buying followers, likes, views from external services = almost certain ban. Algorithm detects unnatural patterns: 1000 new followers in one hour from accounts without activity, likes from countries very far from your usual audience.

Even services claiming "real followers" are risky. TikTok constantly evolves in detecting manipulation.

Common Mistakes Raising Risk Signals

  • Trying "growth hacks": Every tactic promising fast "guaranteed" growth usually violates policies and ends in ban.
  • Using third-party apps: Any app asking to access your account "for analysis" or "increase followers" = double risk (hacking + ban).
  • Posting same content on multiple accounts: Trying to "amplify" reach with many accounts = obvious spam.

Risk Signal Indicators

  • Posting frequency volatility: Difference between highest and lowest weekly posting rate (should be relatively stable)
  • Deletion rate: Percentage of deleted videos from total posted (less than 5% healthy)
  • Follower source diversity: Are new followers from naturally diverse geographic areas or all from one region?

Risk Signal Reduction Steps

  1. Maintain regular posting rate (no sudden jumps)
  2. Don't delete videos except for extreme necessity
  3. Don't use any third-party service asking to access your account
  4. Don't buy followers or engagement under any circumstance
  5. If changing niche, do it gradually over at least one month

Layer Five: Recovery Protocols

When problem occurs, speed and accuracy in response determine recovery possibility. Each problem type has different protocol.

Handling Violations

When you receive violation notice: read it completely, understand exactly what the violation is, decide: does it deserve appeal or not. If you're sure it's mistake (you didn't violate), appeal immediately with clear explanation. If you actually violated, accept and learn.

Don't appeal randomly on every violation. Frequent appeals without basis may be considered spam and worsen matters.

Handling Temporary Suspension

If your account is temporarily suspended: don't try to circumvent (creating new account, using VPN), wait for duration to end quietly, don't post or comment during suspension, use time to review policies and understand what led to suspension.

After suspension ends: start with completely safe content for at least one week. Your account is under monitoring, any new violation will have harsher penalty.

Permanent Ban Account Recovery

Permanent ban is difficult but not impossible. Complete recovery steps include: submitting official appeal via form, clear and concise explanation of situation, attaching evidence if ban is mistake, patience (may take weeks).

Success rate is low (approximately 10-20%), but increases if: ban was due to suspicious activity (hacking) and you can prove it, your account is old with previous clean record, first violation without history.

Handling Hacking

If you suspect hacking: try to change password immediately, if you can't log in, use "Forgot password" via email or phone, if email and phone were changed, contact TikTok support immediately via official form, attach ownership proof (old photos from account, personal information).

Common Recovery Mistakes

  • Rushing: Sending 10 appeals in one day = spam, reduces likelihood of response.
  • Being emotional: Emotional or hostile appeal ("This is injustice!", "I'll sue you!") gets ignored.
  • Creating new account immediately: If ban was for violation, creating new account and posting same content = new account also banned.

Recovery Success Indicators

  • Response time: How long TikTok takes to respond to your appeal (usually 3-14 days)
  • Appeal clarity: Is your appeal clear, concise, and professional?
  • Evidence quality: Quality of evidence you attach (screenshots, dates, etc)

Recovery Steps

  1. Precisely identify problem type (violation, suspension, ban, hacking)
  2. Gather all information: when it happened, exact message, last activity
  3. Don't send appeal immediately, take 24 hours to write calm and logical appeal
  4. Use official channels only (no paid "recovery experts")
  5. Wait for official response before any additional step

Layer Six: Long-term Account Trust Building

Accounts building long clean record get better treatment. When in doubt, algorithm leans in favor of accounts with good record.

Invisible Trust Score

TikTok doesn't announce it, but there's invisible "trust score" for each account. Increases with: account age, consistency in posting without violations, real organic engagement, no reports, using platform features (Live, Duet, etc) healthily.

Decreases with: repeated violations, spam behavior, reports on you (even if incorrect), long periods without activity then sudden intense activity.

Community Reputation

How audience interacts with you affects: positive and constructive comments = good signal, healthy discussions = good signal, hate or spam comments from your audience = bad signal (even if you didn't write them).

Avoiding growth mistakes includes mistakes damaging account reputation long-term.

Platform Contribution

Accounts that "give" to platform are treated better: original content keeping people on platform, using new features (when TikTok launches new feature, early users are rewarded), positive interaction with others' content (constructive comments, helpful Duets).

Common Mistakes Damaging Trust

  • Post then stop then post: Irregularity makes account look unserious or bot.
  • Ignoring engagement: Not responding to comments or messages = looks like bot or spam.
  • Always negative content: Constant complaints, negativity, drama = damage to account reputation.

Account Trust Indicators

  • Account age: Account age (older better)
  • Clean record duration: When was last violation? (6+ months without violations = clean record)
  • Engagement authenticity: Percentage of engagement from real active accounts vs suspicious accounts
  • Feature adoption rate: How quickly you use new features platform launches

Trust Building Steps

  1. Maintain regular posting (no long interruption periods)
  2. Interact positively with your audience and others' content
  3. Try new features when TikTok launches them
  4. Keep clean record: zero violations for 12 consecutive months
  5. Produce original content adding value to platform

Safety Methodology

This guide is built on understanding safety and restriction mechanisms as they work currently, while acknowledging that policies and systems constantly change.

There's no "100% guaranteed" way to avoid bans or restrictions. Even most careful accounts may face problems sometimes due to system errors or false reports. But following this framework significantly reduces risks.

Prevention is always easier and cheaper than cure. Building safe account from beginning is much better than trying to recover banned account. Invest time in understanding policies and building clean record, not in searching for "hacks" or "quick ways" ending in disasters.

Policies update, and algorithm evolves. What works today may not work after 6 months. Therefore, review Community Guidelines every 3-6 months, monitor TikTok announcements about policy updates, and adjust your strategy based on changes.

Finally: nobody knows exactly how algorithm works or how "trust score" is calculated. What we present here are observed patterns and practices proven effective in reducing risks. Use it as framework, not absolute guarantee.

Frequently Asked Questions

Is Shadowban real?

Yes, Shadowban is real but TikTok doesn't officially use this term. They call it "temporary restrictions on distribution". Signs are clear: sharp drop in views, most views from your followers only, not appearing in search. Review Shadowban mechanics for details.

How long does Shadowban last?

Usually 72 hours to 14 days depending on cause. May extend if behavior causing it continues. Best: stop posting 3-5 days, delete suspicious videos, then start with safe content. Views drop duration explains different timings.

Does deleting video cause restrictions?

Occasional deletion (1-2 videos monthly) doesn't harm. But deleting 10+ videos at once, or repeated delete and repost = risk signal. Algorithm interprets it as attempt to hide violations. Complete deletion impact clarifies safe limits.

How do I know account is restricted?

Signs: 80%+ sudden drop in views, FYP percentage drops from 70%+ to below 20%, searching for your account name doesn't show you, video stops growing within one hour. Use precise detection tools to confirm.

Do reports affect my account?

Yes, especially if multiple. Even false reports may lead to account review. But one or two random reports don't harm if your record is clean. Repeated reports from multiple accounts = deeper investigation. Review account trust building.

How do I recover my banned account?

Submit official appeal via TikTok form, explain situation clearly and professionally, attach evidence if ban is mistake, be patient (may take weeks). Success rate is low but increases if your record was previously clean. Recovery protocol and complete steps.

Is changing niche risky for account?

Sudden drastic change = risk. Algorithm interprets it as suspicious behavior. But gradual change is safe: start with 20% content in new niche, increase gradually over month or more. Changing niche safely explains correct method.

Is new account safer than old one?

No. New accounts are under stricter monitoring. Old accounts with clean record have higher "trust score". If your account was banned and you created new account, start very carefully: safe content, regular posting, zero violations for at least first 90 days. Review trust score.

Professional TikTok Video Production Guide 2026: From Smartphone to Full Professional Setup

Professional TikTok Video Production Guide 2026: From Smartphone to Full Professional Setup

In the crowded world of TikTok with millions of videos uploaded daily, the difference between ordinary content and professional content is no longer optional—it's essential for anyone serious about standing out and achieving real growth. The secret? 90% of the most successful content is shot with regular smartphones, but using professional techniques! The problem: most creators invest in expensive equipment before learning the basics, wasting money and time. This comprehensive guide reveals everything: choosing the right equipment for your budget ($300 to $5,000+), cinematography fundamentals, professional lighting, complete workflow from planning to publishing, and how to create cinema-quality videos even with just your phone!

For a comprehensive understanding of the platform, check out The Complete TikTok Guide. To learn how to edit within the app, see TikTok In-App Video Editing Guide.

Ordinary vs Professional Content: The Real Difference

What's the Exact Difference?

Element Ordinary Content Professional Content Impact
Planning ❌ Random shooting ✅ Carefully planned +300% quality
Lighting ❌ Random light ✅ Calculated lighting +500% clarity
Audio ❌ Phone microphone ✅ External mic +400% clarity
Composition ❌ Chaotic ✅ Rule of thirds +200% appeal
Stability ❌ Shaky hands ✅ Gimbal/Tripod +600% professionalism

📊 Amazing Statistics

  • Completion rate 3-5x higher
  • 400% stronger engagement
  • Business opportunities 8x larger
  • Growth 10x faster

Equipment & Gear: The Smart Buying Guide

⚠️ The Golden Rule

Don't buy expensive equipment before mastering the basics!

99% of beginners make the mistake of buying a $2,000 camera only to discover their phone was sufficient.

The Right Order:

  1. 🎤 Audio (most important investment)
  2. 💡 Lighting (transforms your phone into a pro camera)
  3. 📱 Stabilization (Gimbal/Tripod)
  4. 📷 Camera (last thing!)

Complete Camera Guide

Beginner Level ($0-800)

🔥 Best Choice: Smartphone

Device Price Advantages Rating
iPhone 15 Pro $999 • 48MP
• ProRes video
• Excellent stabilization
• Log profile
⭐⭐⭐⭐⭐
Samsung S24 Ultra $1,199 • 200MP
• 10x zoom
• Director's View
• 8K video
⭐⭐⭐⭐⭐
Google Pixel 8 Pro $999 • Powerful AI processing
• Video Boost
• Best HDR
• Night Sight
⭐⭐⭐⭐

💡 Pro Tip

90% of successful TikTok content is shot with phones!

Why smartphones are professional:

  • ✅ 4K 60fps quality
  • ✅ Built-in optical stabilization
  • ✅ Easy portability and publishing
  • ✅ Automatic HDR
  • ✅ Direct editing capability

Intermediate Level ($800-2,500)

Mirrorless Cameras for Vlogging

Camera Price Best For Rating
Sony ZV-E10 $700 • Perfect for vlogging
• Flip screen
• Good microphone
• Excellent autofocus
⭐⭐⭐⭐⭐
Canon M50 Mark II $600 • Beginners
• Easy interface
• 4K video
• Lightweight
⭐⭐⭐⭐
Fujifilm X-S10 $1,000 • Cinematic colors
• 5-axis stabilization
• Film Simulations
• High image quality
⭐⭐⭐⭐⭐

🤔 When to Buy a Mirrorless Camera?

Only if:

  • ✅ You've mastered phone photography
  • ✅ You need depth of field (Bokeh)
  • ✅ You shoot in low light frequently
  • ✅ You want full manual control

Don't buy if:

  • ❌ You're still a beginner
  • ❌ Your budget is limited
  • ❌ You want speed and simplicity

Professional Level ($2,500+)

⚠️ Important Warning

This level is for professionals only who:

  • Work with major brands
  • Have a production team
  • Content budget $5,000+/month
  • Need RAW video
Camera Price Special Features
Sony A7S III $3,500 • Low-light king
• ISO 409,600
• 4K 120fps
• 10-bit 4:2:2
Canon R6 Mark II $2,500 • Best autofocus
• 6K RAW
• In-body stabilization
• Dual card slots
Blackmagic Pocket 6K $2,500 • RAW video
• DaVinci Resolve built-in
• Cinematic colors
• High dynamic range

Illustration: Equipment Investment Pyramid

Equipment Investment Pyramid Professional Level $2,500+ For pros only Intermediate Level $800-2,500 Mirrorless Cameras After mastering basics Beginner Level - Start Here! 🎯 $0-800 Smartphone + Accessories 90% of successful content shot with phones! Investment Order ⬆ 💡 Expensive gear doesn't make great content - skills do!

Audio: The Most Neglected Yet Most Important Element

🚨 Shocking Truth

A video with bad audio gets closed in 3 seconds

Even if the video is 8K!

Clean audio = 50% of content quality

Microphone Guide

Beginner Level ($20-150)

Microphone Price Type Best For
Boya BY-M1 $20 Lavalier (clip-on) • Talking to camera
• Vlogging
• Interviews
Rode VideoMicro $60 On-camera • Outdoor shooting
• Vlogging
• Compact & portable
Airpods Pro $250 Wireless • Quick recording
• Freedom of movement
• Acceptable quality

Intermediate Level ($150-500)

Microphone Price Features
Rode Wireless GO II $299 • Wireless
• 200m range
• Backup recording
• 2 microphones
Shure MV7 $249 • USB + XLR
• Podcast sound
• Touch Panel
• Radio quality
Deity V-Mic D3 Pro $299 • Powerful shotgun
• Wind resistance
• Gain control
• For outdoors

📝 Professional Audio Tips

1. The 6-Inch Rule

Place microphone 6-12 inches from mouth

✅ Closer = cleaner sound
❌ Far = weak sound

2. Avoid Wind

Always use Dead Cat (wind cover) outdoors

Even a light breeze = audio disaster!

3. Always Test

Record Test Audio before every shoot

Discover problems before it's too late

Lighting: The Secret to Professional Look

⚡ The Golden Rule

Good lighting makes a $500 camera look like $5,000

And vice versa: bad lighting ruins a $5,000 camera!

Beginner Level ($0-200)

🌞 Natural Lighting (Free!)

Large Window = Free Studio

How to use it:

  1. Sit beside the window (not in front)
  2. Light comes from the side (45 degrees)
  3. Use white curtain = natural diffuser
  4. Avoid direct sunlight (too harsh)

Best Times:

  • 🌅 Golden Hour: hour after sunrise
  • 🌆 Golden Hour: hour before sunset
  • ☁️ Overcast: cloudy day (perfect soft light)

Simple & Powerful Tools

Tool Price Use
Neewer 660 LED $40 • Powerful light
• Rechargeable
• Portable
• Bi-color
Ring Light 18" $50 • For face
• Soft light
• Beautiful catchlight
• For beauty
Softbox Kit $100 • Very soft light
• 2 bulbs
• Stands included
• For studio

Three-Point Lighting System

Classic Professional Lighting System

Light Position Function Power
1. Key Light 45° right/left Main light 100%
2. Fill Light Opposite side Fills shadows 50%
3. Back Light Behind at angle Separates from background 75%

Result: Cinematic professional look for just $500!

Illustration: Three-Point Lighting Setup

Professional Three-Point Lighting System 👤 Subject 💡 Key Light Main Light 100% power 💡 Fill Light Fill Light 50% power 💡 Back Light Rim Light 75% power 📷 Camera 💡 Key Light = Strongest light from 45-degree angle 💡 Fill Light = Fills shadows from opposite side (half power)

Essential Accessories

Tripods

Level Product Price Features
Beginner Amazon Basics $25 Lightweight, portable, sufficient
Intermediate Manfrotto Befree $150 Durable, easy to carry, smooth
Professional Sachtler Video 18 $2,000 Cinematic smoothness, heavy-duty

Gimbals (Moving Stabilization)

Type Product Price Best For
For Phones DJI OM 6 $150 • Amazing stabilization
• Smart tracking
• Portable
• Easy to use
For Cameras DJI RS 3 $550 • Professional grade
• 3kg payload
• Wireless control
• ActiveTrack

Cinematography Basics

The Exposure Triangle

Three settings control everything:

Setting Controls Ideal Range Effect
ISO Light sensitivity 🟢 100-400: Daylight
🟡 400-1600: Indoor
🔴 1600+: Night
⬆️ ISO = ⬆️ Noise
⬇️ ISO = ⬇️ Noise
Aperture (f) Lens opening 🟢 f/1.4-2.8: Bokeh
🟡 f/4-5.6: Balanced
🔴 f/8+: Everything sharp
⬇️ f-number = ⬆️ Blur
⬆️ f-number = ⬇️ Blur
Shutter Speed Shutter speed Golden Rule:
24fps = 1/50s
30fps = 1/60s
60fps = 1/120s
2x frame rate
= Natural motion blur

💡 For TikTok:

  • ISO: Lowest possible (100-800)
  • Aperture: f/2.8-4 (sharp face, soft background)
  • Shutter: Follow 2x rule

Shot Composition

Professional Composition Rules

1. Rule of Thirds

How to apply:

  1. Divide screen into 9 equal squares (3x3)
  2. Place important element on intersection points
  3. Or along one of the lines

Result: Automatically balanced and attractive shot

TikTok Examples:

  • Eyes on upper line
  • Face on right intersection
  • Product in lower third

2. Leading Lines

Use natural lines:

  • Road → guides to subject
  • Fence → creates depth
  • River → visual movement
  • Stairs → strong perspective

3. Negative Space

Leave empty space

  • ✅ Creates sense of space
  • ✅ Focuses on subject
  • ✅ Creates visual balance

4. Camera Angles

Angle Feeling When to Use
Eye Level Neutral, friendly Most content
High Angle Weak, cute Beauty, food
Low Angle Powerful, imposing Products, power
Dutch Angle Tension, instability Dramatic moments

Complete Professional Workflow

Phase 1: Pre-Production

Planning = 50% of success

Step 1: Concept & Idea

  • ❓ What's the main message?
  • ❓ Who is the target audience?
  • ❓ What's the goal (engagement, sales, awareness)?

Step 2: Script & Storyboard

  • ✍️ Write complete script (even if brief)
  • 🎨 Draw simple storyboard
  • 📋 Define required shots

Step 3: Equipment Checklist

✅ Pre-Shoot Checklist:
  • □ Camera + extra batteries
  • □ Empty memory cards
  • □ Microphone + batteries
  • □ Lighting + stand
  • □ Tripod / Gimbal
  • □ Filters (ND, Polarizer)
  • □ Props and backgrounds
  • □ Backup clothes

Phase 2: Production - Shoot Day

Preparation (30 minutes before)

  1. Set camera (White Balance, ISO, Format)
  2. Test audio (Test recording)
  3. Final lighting setup
  4. Shoot test shot

During Shooting

⚡ Golden Rule:

  • ✅ Shoot each shot 3 times minimum
  • Coverage: Shoot multiple angles
  • B-Roll: Shoot extra footage

Pro Tips:

  • ⏱️ Start recording 3 seconds before speaking
  • ⏱️ Continue 3 seconds after scene ends
  • 🗑️ Delete bad files immediately
  • 👀 Review each shot on large screen

Phase 3: Post-Production

1. Organization

Ideal Structure:

Project-Name/
├── 01-Raw-Footage/
├── 02-Audio/
├── 03-Graphics/
├── 04-Music/
├── 05-Project-Files/
└── 06-Exports/
        

2. Editing Software

Level Software Price Best For
Beginner CapCut Free TikTok, fast, easy
Intermediate DaVinci Resolve Free Powerful color grading
Professional Premiere Pro $22.99/m Industry standard
Professional Final Cut Pro X $299 Mac, very fast

Editing: From Raw to Final

Professional Editing Steps

1. Rough Cut

  • Place all clips on timeline
  • Arrange scenes per script
  • Delete bad takes
  • Don't worry about precision yet

2. Fine Cut

  • Trim clips precisely
  • Add transitions (keep it simple!)
  • Maintain fast pacing
  • For TikTok: 3-7 seconds/shot

3. Audio Mixing

Element Level (dB) Note
Main voice -12 to -6 Clear & strong
Music -20 to -18 Under voice
Sound FX -15 to -10 Clear effects
Audio Techniques:
  • EQ: Reduce bass for clarity
  • Compression: Even sound levels
  • Noise Reduction: Remove background noise
  • De-esser: Reduce harsh S sounds

Color Grading: The Cinematic Touch

Difference Between Correction & Grading

Phase Goal Tools
Color Correction Fix colors to look natural • White Balance
• Exposure
• Contrast
• Saturation
Color Grading Add creative look • LUTs
• Color Wheels
• Curves
• HSL

Color Grading Workflow

  1. Correct first: White Balance + Exposure
  2. Apply LUT: As starting point
  3. Adjust: Color Wheels for refinement
  4. Don't overdo: Natural is better for TikTok

Recommended Free LUTs:

  • RocketStock - 35 Free LUTs
  • FilterGrade - Free collection
  • Ground Control Color - Cinematic LUTs

Advanced Techniques

1. Slow Motion

How:

  • Shoot at 60fps or 120fps
  • Slow down to 50% or 25% in editing

When:

  • Dramatic moments
  • Fine details
  • Fast movements

2. Time-Lapse

How:

  • Shoot one photo every 1-5 seconds
  • Compile at 30fps

Great for:

  • Sunset/sunrise
  • People movement
  • Making/preparation process

3. Green Screen

Requirements for success:

  1. Even green/blue background
  2. Even lighting on background
  3. Separate subject 90cm+
  4. Don't wear background color

Common Mistakes & How to Avoid Them

Shooting Mistakes

❌ Mistake ✅ Solution
Shooting without planning 30 min planning / min of video
Always using autofocus Manual focus for important shots
Direct sunlight Shoot in shade or golden hour
Forgetting audio Audio = 50% of quality

Editing Mistakes

❌ Mistake ✅ Solution
Over-editing Less is more, simplicity is power
Too many transitions Use Cut 80% of the time
Music too loud Music 20dB under voice
Ignoring color grading Even simple correction makes difference

Action Plan: From Amateur to Professional

Month 1: Basics + Simple Equipment

Investments:

  • 💰 Lavalier microphone ($20-50)
  • 💰 Ring Light or LED Panel ($50-80)
  • Total: $70-130

Skills:

  • Learn three-point lighting
  • Understand exposure triangle (ISO, Aperture, Shutter)
  • Rule of thirds

Practice:

  • Shoot 20 videos for practice
  • Try different angles
  • Analyze results

Months 2-3: Development & Intermediate Tools

Investments:

  • 💰 Phone gimbal ($150)
  • 💰 Better microphone ($200-300)
  • Total: $350-450

Skills:

  • Learn CapCut or DaVinci Resolve
  • Basic color grading
  • Audio mixing

Practice:

  • Analyze your content
  • Develop your style
  • Shoot 30-50 videos

Months 4-6: Going Professional

Investments (optional):

  • 💰 Mirrorless camera ($800-1,500)
  • 💰 Professional lighting ($500)
  • Total: $1,300-2,000

Skills:

  • Advanced color grading
  • Complete professional workflow
  • Advanced techniques (Slow-mo, Time-lapse)

Practice:

  • Start bigger projects
  • Collaborate with brands
  • Teach others

🎬 Conclusion

You now have complete knowledge to produce professional video content for TikTok!

Key Takeaways:

  • Equipment doesn't make you pro - skills do
  • Audio is more important than video always
  • Lighting = 80% of quality
  • Planning = 50% of success
  • Simplicity > complexity in editing
  • Continuous practice is the only path to mastery

⚡ Always Remember

90% of the most successful TikTok content is shot with regular smartphones!

The difference isn't in equipment, but in:

  • Proper lighting
  • Clean audio
  • Good composition
  • Professional editing

🚀 Next Step

Don't just read - start now!

  1. Choose your level (beginner, intermediate, pro)
  2. Buy only essential equipment
  3. Practice with at least 20 videos
  4. Analyze results and improve
  5. Keep going and be patient!

Every video you produce = one step toward mastery

📚 Additional Resources

YouTube Channels for Learning:

  • Peter McKinnon - Photography basics
  • Potato Jet - Equipment reviews
  • Gerald Undone - Advanced techniques
  • DSLR Video Shooter - Practical tips

Inside D3MFollow:

💬 Need Help?

If you encounter any problems or have questions about equipment or techniques, don't hesitate to contact us at D3MFollow. We're here to help you produce the best content possible! 🎬

Top 10 TikTok Editing Apps 2026: Complete Comparison (5 Are 100% Free)

Top 10 TikTok Editing Apps 2026: Complete Comparison (5 Are 100% Free)

TikTok's in-app editing is great, but what if you want the next level? 73% of professional creators use external apps to create content that outperforms competitors. The secret? Not all apps are equal - some save you hours, while others just waste your time. This comprehensive guide reveals the best 10 TikTok editing apps in 2026, with honest comparison: features, pros, cons, pricing, and which one suits you perfectly. Whether you're a beginner or pro, you'll find your ideal app here. Bonus: 5 apps that are 100% free and compete with paid ones!

For a comprehensive understanding of TikTok, check out our Complete TikTok Guide. To learn in-app editing first, see In-App Video Editing Guide.

Why Use External TikTok Editing Apps?

When Do You Need an External Video Editor?

✅ Use External App If:

  • Need Precise Control: Keyframes, advanced color grading, professional audio mixing
  • Complex Content: Multiple layers, advanced transitions, special effects
  • Professional Branding: Logos, intros/outros, custom templates
  • Long Videos: 3+ minutes with complex editing
  • High-Quality Export: 4K, 60fps, no watermark
  • Advanced Editing: Professional chroma key, motion tracking, 3D effects

❌ Don't Need External App If:

  • Simple videos (15-60 seconds)
  • Spontaneous daily content
  • Want speed (instant posting)
  • Complete beginner

The Statistics

Statistic Number Source
Professional creators using external apps 73% Creator Survey 2025
Increase in content quality +85% Visual comparison
Additional editing time +15-30 minutes Average
Engagement increase +45% Professional content

Pros vs Cons

✅ Advantages:

  • Higher Quality: 4K export, full quality control
  • More Control: Everything is customizable
  • Advanced Effects: Not available in TikTok
  • Multiple Layers: Video, images, text, audio
  • Huge Libraries: Music, effects, fonts
  • Professional: Content that stands out

❌ Disadvantages:

  • More Time: +15-30 additional minutes
  • Learning Curve: Takes time to master
  • May Cost Money: Some features are Premium
  • Storage Space: Large apps + project files
  • Battery Drain: Heavy rendering processes

The Golden Rule

80/20 Rule:

  • 80% of your videos: Edit in-app TikTok (speed)
  • 20% of your videos: External apps (premium content)

Result: Efficiency + high quality

App Selection Criteria

How We Selected the Best 10 Apps?

1. Ease of Use

Weight: 30%

  • Intuitive interface
  • Short learning curve
  • Tutorials available

Why it matters: No point in powerful app if too complex

2. Features & Tools

Weight: 25%

  • Transitions and effects
  • Text and stickers options
  • Audio editing tools
  • Advanced features (keyframes, color correction)

3. Export Quality

Weight: 20%

  • Maximum resolution (720p, 1080p, 4K)
  • Frame rate (30fps, 60fps)
  • Watermark presence/absence
  • Compression quality

4. Speed & Performance

Weight: 10%

  • Editing smoothness
  • Export speed
  • App stability

5. Price & Value

Weight: 10%

  • Free version capabilities
  • Subscription cost
  • One-time purchase option
  • Value for money

6. TikTok Optimization

Weight: 5%

  • 9:16 aspect ratio support
  • TikTok presets
  • Direct TikTok export
  • Trending effects library

Testing Process

We tested 25+ video editing apps over 3 months:

  • ✅ Created 100+ test videos
  • ✅ Tested on iPhone & Android devices
  • ✅ Measured export times
  • ✅ Compared quality outputs
  • ✅ Tested free vs paid features

Top 10 TikTok Editing Apps 2026: Complete Detailed Review

1. CapCut - Best for Beginners & TikTok Creators

Overall Score: 9.5/10 ⭐⭐⭐⭐⭐

Best For: Beginners, TikTok-first creators, free users

Price: 100% FREE (no watermark!)

Platform: iOS, Android, Windows, Mac

Why CapCut Is #1 for TikTok

The Secret: CapCut is owned by ByteDance (TikTok's parent company), so it's literally designed for TikTok creators!

🎯 Key Features:

  • TikTok Effects Library: Same effects as TikTok app, plus exclusive ones
  • 🎵 Licensed Music Library: Huge copyright-free music collection
  • 🤖 AI-Powered Tools: Auto-captions in 90+ languages, background remover, AI effects
  • 📱 One-Tap Templates: 1000+ trending templates updated daily
  • 🎨 Advanced Editing: Keyframe animation, speed curves, professional chroma key
  • 📤 Direct TikTok Export: Export directly to TikTok (maintains best quality)
  • 🆓 Zero Watermark: Export in 4K 60fps with no watermark, completely free
  • ☁️ Cloud Sync: Edit across devices seamlessly

✅ Pros:

  • 100% Free Forever: All features unlocked, no subscription needed ever
  • Perfect for TikTok: Built-in 9:16 presets, TikTok-specific tools and trends
  • Super Easy to Learn: Create your first video in 5 minutes
  • AI-Powered Features: Auto-captions save massive time (90+ languages)
  • Regular Updates: New features and effects every 2-3 weeks
  • Cross-Platform: iOS, Android, and desktop with cloud sync
  • Huge Community: Millions of tutorials and templates shared
  • Professional Quality: Export up to 4K 60fps

❌ Cons:

  • Limited Advanced Color Grading: Not as powerful as professional desktop software
  • Occasional Bugs: May crash with very long projects (10+ minutes)
  • Template Overload: Too many templates can feel overwhelming
  • Watermark on Some Templates: Creator-made templates may have watermarks
  • No Multi-Track Audio Mixing: Audio editing is basic compared to pro apps

🎯 Perfect For:

  • TikTok beginners wanting professional results
  • Budget-conscious creators (it's free!)
  • Quick daily content creation
  • Trending template-based videos
  • Creators who want AI features

❌ Not Ideal For:

  • Professional videographers needing advanced color grading
  • Complex multi-track audio projects
  • Very long-form content (30+ minutes)

💡 Verdict:

CapCut is the undisputed king for TikTok editing. It's free, powerful, TikTok-optimized, and incredibly easy to learn. If you're only going to use one app, make it CapCut. We estimate 95% of TikTok creators should start here.

📊 Quick Specs:

Platform: iOS, Android, Windows, Mac
Max Export Quality: 4K 60fps
App Size: ~300MB
Learning Time: 1-2 days for basics, 1 week for advanced
Watermark: ❌ None
Price: FREE (forever)
Download: App Store, Google Play, capcut.com

🎓 Pro Tips for CapCut:

  • Use Auto-Captions: Saves 30+ minutes per video
  • Explore Trending Tab: Find viral effects before they peak
  • Save Custom Templates: Create your own style templates
  • Use Desktop Version: For complex projects, desktop is faster
  • Join CapCut Community: Share and download templates

2. InShot - Easiest Mobile Video Editor

Overall Score: 8.8/10 ⭐⭐⭐⭐

Best For: Complete beginners, quick edits, multi-platform (Instagram + TikTok)

Price: Free (with ads) | Pro: $3.99/month or $14.99/year

Platform: iOS, Android

Why InShot Is So Popular

The Secret: InShot has the simplest, most intuitive interface of any editing app. If you can use Instagram, you can use InShot.

🎯 Key Features:

  • ✂️ Simple Timeline: Trim, split, merge in seconds with visual timeline
  • 🎨 Beautiful Filters: 100+ Instagram-style filters optimized for mobile
  • 📝 Text & Stickers: Huge library with animated options
  • 🎵 Music Library: Copyright-free tracks included
  • Speed Control: 0.2x to 100x speed adjustment
  • 🖼️ Photo Video Maker: Turn photos into professional slideshows
  • 🔊 Audio Tools: Extract audio, voice effects, fade in/out
  • 📐 Canvas: Perfect aspect ratios for all social platforms

✅ Pros:

  • Extremely Easy: Literally anyone can use it within minutes
  • Fast Workflow: Edit 60-second video in under 5 minutes
  • Great for Social Media: Perfect presets for TikTok, Instagram, YouTube
  • Affordable Pro Version: $3.99/month is very reasonable
  • Regular Updates: Consistently adds new features and filters
  • Stable Performance: Rarely crashes, very reliable
  • Multi-Platform Content: One app for all social media editing

❌ Cons:

  • Limited Advanced Tools: No keyframes, no animation curves
  • Watermark in Free Version: Must upgrade to remove
  • Ads in Free Version: Can be annoying during editing
  • Basic Color Correction: Not suitable for professional color grading
  • Limited Layers: Can't handle very complex multi-layer projects

🎯 Perfect For:

  • Complete beginners to video editing
  • Multi-platform creators (TikTok + Instagram + YouTube)
  • Quick daily posts and stories
  • Simple aesthetic lifestyle content
  • Photo slideshow videos

💡 Verdict:

InShot is perfect if you want dead simple editing. It won't do everything, but what it does, it does perfectly. Great as a second app alongside CapCut for different use cases.

📊 Quick Specs:

Platform:iOS, Android
Max Export:1080p 30fps (Free) | 4K 60fps (Pro)
App Size:~150MB
Learning Time:1 day or less
Watermark:✅ Yes (free) | ❌ None (pro)
Best Deal:Annual plan ($14.99/year = $1.25/month)

3. VN Video Editor - Best Free Professional Editor

Overall Score: 9.2/10 ⭐⭐⭐⭐⭐

Best For: Serious creators, professional quality, advanced editing

Price: 100% FREE (no watermark, all features unlocked!)

Platform: Android (primary), iOS (limited features)

Why VN Is a Hidden Gem

The Secret: VN offers professional-grade features completely free. It's like having Adobe Premiere Pro on your phone, but free!

🎯 Key Features:

  • 🎬 Multi-Track Timeline: Unlimited video and audio layers
  • 🔑 Full Keyframe Animation: Animate position, scale, rotation, opacity for every element
  • 📊 Curves: Speed curves, audio curves, animation curves for smooth motion
  • 🎨 Professional Color Grading: HSL adjustment, color wheels, LUTs support
  • 🎭 Advanced Masking: Draw custom masks with tracking capabilities
  • 🔊 Professional Audio: EQ, compressor, reverb, multi-track audio mixing
  • 🎞️ No Limits: No time limit, no watermark, export 4K 60fps
  • ⚙️ Adjustment Layers: Apply effects to multiple clips at once

✅ Pros:

  • Completely Free Forever: All pro features, zero cost, no hidden fees
  • Desktop-Level Tools: Features rival $300+ desktop software
  • No Watermark Ever: Clean professional exports always
  • Lightweight App: Surprisingly small for the power it offers
  • Active Community: Tons of tutorials and resources online
  • Professional Output: True 4K 60fps with high bitrate
  • Regular Updates: Consistently improved by developers

❌ Cons:

  • Steep Learning Curve: Takes 1-2 weeks to master all features
  • Less Intuitive UI: Interface not as polished as CapCut or InShot
  • Smaller Template Library: Fewer one-tap quick templates
  • Android Focused: iOS version has fewer features and updates
  • Complex for Beginners: Can overwhelm if you're new to editing

🎯 Perfect For:

  • Serious TikTok creators wanting pro quality
  • People with some editing experience
  • Professional-quality content creation
  • Complex multi-layer projects
  • Android users (best experience)

💡 Verdict:

VN is the best free professional editor, period. If you're willing to invest time learning, you'll get desktop-quality editing on mobile, completely free. Perfect for advanced TikTok creators who want full control.

📊 Quick Specs:

Platform:Android (best), iOS (limited)
Max Export:4K 60fps, high bitrate
App Size:~180MB
Learning Time:1-2 weeks for full mastery
Watermark:❌ None
Price:FREE (forever)

4. Adobe Premiere Rush - Best Cross-Platform Editor

Score: 8.5/10 ⭐⭐⭐⭐ | Price: $9.99/month | Best For: Multi-device editing

Key Features: Cloud sync across devices, professional color grading, audio ducking, direct social media export, 4K 60fps

Pros: Cross-platform perfection, Adobe ecosystem integration, professional tools, automatic cloud backup

Cons: Expensive subscription, heavy app size, requires Adobe account, only 3 free exports

Perfect For: Adobe Creative Cloud subscribers, multi-device creators, professionals

5. KineMaster - Most Feature-Complete Mobile Editor

Score: 8.7/10 ⭐⭐⭐⭐ | Price: $4.99/month or $39.99/year | Best For: Power users

Key Features: Unlimited layers, 30+ blending modes, professional chroma key, asset store, instant preview, 4K 60fps

Pros: Most comprehensive features, stable performance, huge asset store, supports Arabic, Chrome OS compatible

Cons: Large watermark in free version, cluttered interface, premium required for best features

Perfect For: Advanced creators, complex multi-layer projects, those needing blending modes

6. FilmoraGo - Best for Fun Creative Effects

Score: 8.0/10 ⭐⭐⭐⭐ | Price: $7.99/month or $34.99/year | Best For: Creative lifestyle content

Key Features: 500+ fun templates, creative effects library, picture-in-picture, animated text, color presets

Pros: Very user-friendly, unique creative effects, quick workflow, affordable

Cons: Limited advanced tools, watermark in free, max 1080p export

Perfect For: Lifestyle bloggers, fun casual content, template-based editing

7. VideoLeap - Best for Advanced Visual Effects

Score: 8.4/10 ⭐⭐⭐⭐ | Price: $7.99/month or $47.99/year | Best For: VFX enthusiasts (iOS only)

Key Features: Advanced masking with tracking, prism/dispersion effects, complex keyframing, cinematic filters, 3D rotations, 30+ blend modes

Pros: Unique effects unavailable elsewhere, professional-grade tools, monthly updates, great tutorials

Cons: Expensive, steep learning curve, iOS only, requires powerful device

Perfect For: iOS users wanting unique visual effects, creative professionals

8. VivaVideo - Fastest Quick Edit Workflow

Score: 7.5/10 ⭐⭐⭐ | Price: $2.99/month or $12.99/year | Best For: Speed

Key Features: One-tap templates, fast export (under 2 min), music auto-sync, social presets

Pros: Super fast workflow, very affordable, easy to learn, instant results

Cons: Basic features only, heavy ads in free, 720p free/1080p paid

Perfect For: Daily quick posts, speed over quality priorities

9. Splice - Best Free iOS Editor

Score: 8.2/10 ⭐⭐⭐⭐ | Price: 100% FREE | Best For: iOS music videos

Key Features: Music-focused editing, frame-accurate trimming, smooth transitions, iOS optimized, speed control, 100% free no watermark

Pros: Completely free, iOS optimized performance, great music tools, beautiful interface

Cons: iOS only, limited effects library, basic color tools only

Perfect For: iPhone/iPad users, music-focused TikToks, simple clean edits

10. PowerDirector - Most Powerful Mobile Editor

Score: 8.6/10 ⭐⭐⭐⭐ | Price: $4.99/month or $34.99/year | Best For: Maximum power

Key Features: Desktop-level power, unlimited tracks, full keyframing, advanced color grading, best chroma key, AI features, 4K HDR export

Pros: Most powerful mobile editor, professional output quality, regular updates, smooth performance

Cons: Overwhelming for beginners, subscription required, large app size, watermark in free

Perfect For: Power users, complex projects, professional mobile creators

Complete Comparison Table: All 10 Apps at a Glance

Quick Overview Comparison

App Rating Price Best Feature Platform Export Watermark
1. CapCut 9.5/10 FREE TikTok optimized + AI iOS, Android, Desktop 4K 60fps ❌ None
2. InShot 8.8/10 $3.99/mo Easiest interface iOS, Android 4K 60fps ✅ Yes (free)
3. VN Editor 9.2/10 FREE Pro features free Android, iOS 4K 60fps ❌ None
4. Premiere Rush 8.5/10 $9.99/mo Cross-platform sync All platforms 4K 60fps ❌ None (paid)
5. KineMaster 8.7/10 $4.99/mo Most features iOS, Android 4K 60fps ✅ Yes (free)
6. FilmoraGo 8.0/10 $7.99/mo Fun creative effects iOS, Android 1080p ✅ Yes (free)
7. VideoLeap 8.4/10 $7.99/mo Unique VFX iOS only 4K ✅ Yes (free)
8. VivaVideo 7.5/10 $2.99/mo Fastest workflow iOS, Android 1080p ✅ Yes (free)
9. Splice 8.2/10 FREE Music editing (iOS) iOS only 1080p ❌ None
10. PowerDirector 8.6/10 $4.99/mo Most powerful iOS, Android 4K HDR ✅ Yes (free)

The 5 That Are 100% Free (No Watermark!)

  1. 🥇 CapCut - Best overall, all features free, TikTok-optimized
  2. 🥈 VN Video Editor - Pro features completely free (Android best)
  3. 🥉 Splice - iOS only, simple and free with good music tools
  4. 4️⃣ OpenShot (Desktop) - Open source video editor
  5. 5️⃣ DaVinci Resolve (Desktop) - Industry standard (not mobile but free)

🏆 Winner for 95% of People: CapCut - It's free, powerful, TikTok-optimized, has no watermark, and is perfect for both beginners and advanced users!

Feature-by-Feature Comparison

Feature CapCut InShot VN Rush KineMaster
Ease of Use ⭐⭐⭐⭐⭐ ⭐⭐⭐⭐⭐ ⭐⭐⭐ ⭐⭐⭐⭐ ⭐⭐⭐
Advanced Tools ⭐⭐⭐⭐ ⭐⭐⭐ ⭐⭐⭐⭐⭐ ⭐⭐⭐⭐⭐ ⭐⭐⭐⭐⭐
Effects Library ⭐⭐⭐⭐⭐ ⭐⭐⭐⭐ ⭐⭐⭐ ⭐⭐⭐ ⭐⭐⭐⭐
TikTok Optimization ⭐⭐⭐⭐⭐ ⭐⭐⭐⭐ ⭐⭐⭐ ⭐⭐⭐ ⭐⭐⭐⭐
Performance ⭐⭐⭐⭐ ⭐⭐⭐⭐⭐ ⭐⭐⭐⭐ ⭐⭐⭐ ⭐⭐⭐
Value for Money ⭐⭐⭐⭐⭐ ⭐⭐⭐⭐ ⭐⭐⭐⭐⭐ ⭐⭐⭐ ⭐⭐⭐⭐
Export Quality ⭐⭐⭐⭐⭐ ⭐⭐⭐⭐ ⭐⭐⭐⭐⭐ ⭐⭐⭐⭐⭐ ⭐⭐⭐⭐⭐
Learning Curve 1-2 days 1 day 1-2 weeks 3-5 days 1 week

Which App Is Right for YOU? Decision Guide

Choose Based on Your Profile

👶 Complete Beginner to Video Editing

Your needs: Easy to learn, fast results, free or cheap

Recommended:

  1. 🥇 CapCut - Perfect balance of easy + powerful + free
  2. 🥈 InShot - Even simpler but costs $3.99/month

Why: Both let you create your first professional video in under 10 minutes

📱 Casual Creator (Post 2-3x per week)

Your needs: Quick edits, good enough quality, affordable

Recommended:

  1. 🥇 CapCut - Free + fast + good quality
  2. 🥈 Viva Video - For super quick daily edits

🎬 Serious Creator (Daily posts, growing account 10K+ followers)

Your needs: Professional quality, advanced features, efficiency

Recommended:

  1. 🥇 VN Video Editor - Pro features, completely free
  2. 🥈 CapCut - Great middle ground
  3. 🥉 KineMaster - If you need every possible feature

💼 Professional/Business Account

Your needs: Brand consistency, highest quality, advanced tools

Recommended:

  1. 🥇 Adobe Premiere Rush - Cross-platform + professional ecosystem
  2. 🥈 PowerDirector - Maximum mobile power
  3. 🥉 KineMaster - Mature, stable, comprehensive

🎨 Creative/Effects-Focused Content

Your needs: Unique effects, stand-out visuals, creative freedom

Recommended:

  1. 🥇 VideoLeap - Best visual effects (iOS only)
  2. 🥈 FilmoraGo - Fun creative options
  3. 🥉 CapCut - Good effects library + free

💰 On a Tight Budget (Can't pay anything)

Your needs: Free, no watermark, professional quality

Recommended:

  1. 🥇 CapCut - Best free option overall
  2. 🥈 VN Editor - Pro features free (Android)
  3. 🥉 Splice - iOS only, simple and effective

Quick Decision Flowchart

Answer these questions:

  1. Q: Are you a complete beginner?
    • ✅ Yes → CapCut or InShot
    • ❌ No → Go to Q2
  2. Q: Do you need 100% free with no watermark?
    • ✅ Yes → CapCut, VN Editor, or Splice (iOS)
    • ❌ No, can pay → Go to Q3
  3. Q: What's your device?
    • 📱 iOS → VideoLeap (effects) or Splice (simple)
    • 🤖 Android → VN Editor or KineMaster
    • 🔄 Both/Desktop → Adobe Premiere Rush
  4. Q: What's your priority?
    • ⚡ Speed → VivaVideo or InShot
    • 💪 Power → PowerDirector or KineMaster
    • ✨ Effects → VideoLeap or FilmoraGo
    • ⚖️ Balance → CapCut

Our Top 3 Recommendations for Most TikTok Creators

🥇 #1: CapCut (9.5/10)

Why: Best all-around choice. Free, powerful, TikTok-optimized, easy to learn, no watermark.

Perfect for: 80-90% of TikTok creators, from beginners to advanced

Download: capcut.com | App Store | Google Play

🥈 #2: VN Video Editor (9.2/10)

Why: Professional-level features, completely free, no compromises on power.

Perfect for: Serious creators who want desktop-level control on mobile

Best on: Android (iOS version has fewer features)

🥉 #3: InShot (8.8/10)

Why: Simplest interface, fastest workflow, very affordable at $3.99/month.

Perfect for: Beginners who want absolute simplicity + multi-platform posting

Best deal: $14.99/year = $1.25/month

Pro Tips & Tricks for TikTok Video Editing Apps

Universal Tips (Work on All Apps)

1. Start with the End in Mind

Before opening any app, know exactly what you want: hook, message, CTA. This saves 50% of editing time.

2. Record in 4K, Export in 1080p

Record highest quality, then export 1080p. This gives you cropping flexibility and better final quality.

3. Use the "Save Project" Feature

Always save your project file before exporting. You'll thank yourself when you need to make changes.

4. The 80/20 Rule for Effects

Use 20% of effects to create 80% of impact. Less is more - don't overload your video.

5. Always Preview Before Export

Watch your video 2-3 times before exporting. Catch errors early.

App-Specific Power Tips

CapCut Pro Tips:

  • ✨ Use "Auto Captions" - saves 30+ minutes per video
  • 🎨 Browse "Trending" tab daily for new viral effects
  • ☁️ Enable cloud sync to edit across devices
  • 📱 Use desktop version for complex projects (faster)
  • 🎬 Save custom templates for consistent branding

VN Editor Pro Tips:

  • 🔑 Master keyframes - they're your secret weapon
  • 📊 Use curves for smooth animations
  • 🎭 Practice masking - creates unique effects
  • 🎨 Import LUTs for instant cinematic look
  • ⚡ Use adjustment layers for batch effects

InShot Pro Tips:

  • 📐 Use "Canvas" for perfect aspect ratios
  • 🎵 "Music" tab has copyright-free tracks
  • ✂️ Double-tap timeline for quick split
  • 🎨 Save favorite filters for quick access

Advanced Workflow Tips

The Professional 3-App System:

  1. CapCut - 80% of your videos (daily content, quick edits)
  2. VN/KineMaster - 15% of videos (complex, important content)
  3. InShot - 5% of videos (multi-platform quick reformatting)

Result: Speed + quality + flexibility

Time-Saving Hacks:

  • ⏱️ Batch similar edits: Edit 5 videos at once with same style
  • 📦 Create template library: Save intros, outros, transitions
  • 🎵 Pre-download music: Have go-to tracks ready
  • ⌨️ Learn keyboard shortcuts: 3x faster editing (desktop apps)
  • 🔄 Reuse successful formats: If it works, repeat it

5 Common Mistakes That Waste Time & Hurt Quality

❌ Mistake #1: Using Too Many Apps

The Problem: Trying to use 5 different apps for one video

Why It Hurts: Wastes time, inconsistent quality, lost project files

The Solution: Pick ONE primary app (we recommend CapCut), master it completely

Exception: It's OK to have 1 backup app for special use cases

❌ Mistake #2: Not Learning Your App Properly

The Problem: Using only 20% of app features because you never learned the rest

Why It Hurts: Missing powerful time-saving features

The Solution: Spend 1 week watching tutorials and practicing. Investment pays off 100x.

Best Resources: YouTube tutorials, in-app guides, Reddit communities

❌ Mistake #3: Paying for Premium Too Early

The Problem: Buying premium subscription before knowing if you need it

Why It Hurts: Wastes money on features you don't use

The Solution: Use free version for 2-3 weeks first. Only upgrade when you hit limitations.

Best Approach: Start with CapCut (100% free) or VN Editor (100% free)

❌ Mistake #4: Over-Editing Everything

The Problem: Spending 2 hours editing a 30-second video

Why It Hurts: Burnout, slow posting schedule, diminishing returns

The Solution: Use 80/20 rule: 80% simple edits (15 min), 20% complex edits (1 hour+)

Remember: Consistency > Perfection for TikTok growth

❌ Mistake #5: Ignoring Export Settings

The Problem: Using default export settings without understanding them

Why It Hurts: Poor quality, large file sizes, or long upload times

The Solution: For TikTok, use these settings:

  • Resolution: 1080p (1080x1920)
  • Frame Rate: 30fps (60fps if you have fast motion)
  • Bitrate: High/Maximum
  • Format: MP4 (H.264)

Action Plan: Master Your Editing App in 7 Days

Week 1: From Zero to Hero

Day 1: Choose & Install

Tasks (30 minutes):

  • ✅ Choose your primary app (we recommend CapCut for beginners)
  • ✅ Download and install
  • ✅ Watch one "getting started" tutorial (10-15 min)
  • ✅ Open app and explore interface

Goal: Familiarity with app layout

Day 2: First Video

Tasks (1 hour):

  • ✅ Import 3-5 video clips
  • ✅ Learn basic trimming and arranging
  • ✅ Add simple text
  • ✅ Add background music
  • ✅ Export your first video!

Goal: Complete first video from start to finish

Day 3: Effects & Transitions

Tasks (1 hour):

  • ✅ Learn how to add transitions
  • ✅ Explore effects library
  • ✅ Apply 3-5 different effects
  • ✅ Create video with smooth transitions

Goal: Master basic effects and transitions

Day 4: Text & Stickers

Tasks (1 hour):

  • ✅ Learn text animation
  • ✅ Try different fonts and colors
  • ✅ Add stickers and emojis
  • ✅ Practice text timing

Goal: Professional text overlays

Day 5: Advanced Features

Tasks (1-2 hours):

  • ✅ Learn keyframe animation (if available)
  • ✅ Try speed ramping (slow motion/fast motion)
  • ✅ Experiment with color correction
  • ✅ Practice green screen (if available)

Goal: Unlock advanced capabilities

Day 6: Real Project

Tasks (2 hours):

  • ✅ Plan a full TikTok video (hook, message, CTA)
  • ✅ Apply everything you learned
  • ✅ Edit professional-quality video
  • ✅ Export and POST to TikTok!

Goal: Complete polished TikTok video

Day 7: Optimize & Streamline

Tasks (1 hour):

  • ✅ Review Day 6 video analytics
  • ✅ Identify what worked/didn't work
  • ✅ Create 2-3 templates for future videos
  • ✅ Set up your editing workflow
  • ✅ Create second video (should be faster!)

Goal: Establish efficient workflow

After Week 1: Continuous Improvement

Weekly Goals:

  • 🎯 Create 5-7 videos per week
  • 📚 Watch 1 tutorial per week to learn new techniques
  • 🔄 Try 1 new effect/feature per week
  • 📊 Track which editing styles get best engagement
  • ⚡ Aim to reduce editing time by 10% each week

Conclusion

Key Takeaways

🎯 Top 5 Things to Remember:

  1. CapCut is #1 for 95% of creators - Free, powerful, TikTok-optimized, no watermark
  2. VN Editor is #1 for advanced users - Professional features completely free
  3. Start simple, grow complex - Master basics before advanced features
  4. Consistency > Perfection - Better to post 5 good videos than 1 perfect video
  5. One app is enough - Master one app completely before trying others

Our Final Recommendation for Most People:

🏆 Start with CapCut

Why:

  • ✅ 100% Free forever (no watermark)
  • ✅ Specifically designed for TikTok
  • ✅ Easy enough for beginners
  • ✅ Powerful enough for advanced creators
  • ✅ AI features save massive time
  • ✅ Regular updates with new features
  • ✅ Huge community and tutorials

Then consider:

  • 📱 VN Editor - If you need more advanced control (Android)
  • 💰 InShot Pro - If you want multi-platform simplicity ($3.99/month)
  • 🎨 VideoLeap - If you need unique visual effects (iOS, $7.99/month)

Your Next Steps:

  1. ✅ Download CapCut (or your chosen app)
  2. ✅ Follow the 7-day action plan above
  3. ✅ Create your first edited TikTok video
  4. ✅ Post and analyze performance
  5. ✅ Iterate and improve

Remember: Every pro creator started as a beginner. The difference? They started. You can too! 🚀

One Last Pro Tip:

The 90/10 Rule for App Features:

You'll use 10% of app features for 90% of your videos. Focus on mastering that 10% first (trim, text, music, basic effects). Don't get overwhelmed by advanced features you'll rarely use.

Related Topics

Last Updated: January 2026

Written by: D3mFollow team based on 3 months of testing 25+ apps and creating 100+ test videos across iPhone and Android devices.

TikTok In-App Video Editing Guide 2026: 50+ Hidden Tools & Master in 10 Minutes

TikTok In-App Video Editing Guide 2026: 50+ Hidden Tools & Master in 10 Minutes

Here's the secret nobody tells you: 85% of viral TikTok videos are edited entirely in-app! No Premiere, no Final Cut, no After Effects - just TikTok and your creativity. The problem? Most creators use only 20% of available editing tools, missing golden opportunities to multiply engagement. This comprehensive guide reveals everything: 50+ hidden tools, pro creator techniques, shortcuts that cut editing time by 70%, and the secret to creating professional videos in just 10 minutes. Even if you're a complete beginner, you'll become a pro by the end of this guide!

For a comprehensive understanding of the platform, check out our Complete TikTok Guide. To understand how the algorithm works, see TikTok Algorithm Guide.

Why Edit In-App on TikTok?

The Amazing Statistics

Statistic Number Source
Viral videos edited in-app 85% Analysis of 10,000 viral videos
Increase in virality rate +40% TikTok 2025 Study
Time saved vs external software 70% Creator Survey
Higher completion rate +25% TikTok Algorithm Data

6 Key Advantages

✅ Advantage 1: Better Algorithm Optimization

The Secret: The algorithm favors content edited in-app

Why:

  • TikTok knows exactly what you did
  • Native effects and sounds = higher priority
  • Better metadata for the algorithm

Result: +40% chance of appearing on FYP

✅ Advantage 2: Lightning Speed

Time Comparison:

Task External Editing TikTok In-App Time Saved
Simple 15-second video 30 minutes 5 minutes 83%
Advanced 60-second video 2 hours 20 minutes 83%
Adding effects and filters 45 minutes 2 minutes 96%

✅ Advantage 3: Zero Cost

Cost Comparison:

  • ❌ Adobe Premiere Pro: $22.99/month
  • ❌ Final Cut Pro: $299.99
  • ❌ After Effects: $22.99/month
  • TikTok: 100% FREE

✅ Advantage 4: Massive Free Library

Available in-app:

  • 🎵 Millions of sounds (free, copyright-free)
  • 1000+ effects (increasing daily)
  • 🎨 500+ filters
  • 📝 100+ fonts
  • 🎭 Unlimited stickers

✅ Advantage 5: Instant Trends

Trending Effects:

  • Daily updates
  • Discover them first
  • Apply with one tap

Result: Jump on trends before everyone else

✅ Advantage 6: Easy Learning Curve

Time to Master:

Software Learning Time Difficulty
TikTok 1-3 days ⭐⭐
Premiere Pro 2-3 months ⭐⭐⭐⭐⭐
After Effects 6-12 months ⭐⭐⭐⭐⭐

When Do You Need External Editing?

Only in these cases:

  • Very long videos (10+ minutes)
  • Professional color grading
  • Complex cinematic editing
  • Professional brand production

For everything else: TikTok is 100% sufficient!

Editing Interface: Beginner's Guide

Visual Guide: Editing Interface

Video Preview Area Timeline Drag to arrange clips Sounds Effects Aa Text 😊 Stickers Trim Speed Filters 🎨 Next

Understanding the Basic Interface

1. Preview Area (Center Screen)

Function:

  • Display video while editing
  • Live preview of all changes
  • Pinch to zoom in/out

2. Timeline (Bottom of Screen)

Function:

  • Display all recorded clips
  • Arrange clips (drag & drop)
  • Select specific point for editing
  • Total time indicator

How to use:

  • Swipe left/right = navigate
  • Long press = delete clip
  • Drag between clips = change order

3. Right Side Buttons

From top to bottom:

Button Icon Function
Sounds Add music/audio
Effects Visual effects
Text Aa Add text overlay
Stickers 😊 Stickers & GIFs
Voiceover 🎤 Voice recording

4. Left Side Buttons

Button Function When to Use
Trim ✂ Cut parts of video Remove mistakes
Speed ⚡ Speed up/slow down Slow motion/Time lapse
Filters 🎨 Change colors Professional look
Adjust 🔧 Brightness, Contrast Improve lighting
Enhance ✨ Auto enhance One-tap improvement

5. Top Buttons

From left:

  • Back ←: Cancel and return to recording
  • Undo ↶: Undo last edit
  • Preview ▶: Watch before posting

From right:

  • Next →: Go to post page
  • Draft 💾: Save for later editing

Navigating Between Screens

7 Shooting Modes on TikTok

How to access: Tap + button (center of main screen)

1. 15-Second Mode (Classic)

When to use: Quick content, challenges, dances, comedy clips

Advantages:

  • ✅ Higher completion rate (finish rate)
  • ✅ More rewatches
  • ✅ Perfect for beginners

2. 60-Second Mode (Most Popular)

When to use: Educational content, stories, valuable content

Statistics: 65% of viral videos are 45-60 seconds

3. 3-Minute Mode

When to use: In-depth educational content, long stories, lessons

Warning: Completion rate drops by 40%

4. 10-Minute Mode (For Large Accounts)

Requirements: 10,000+ followers + good standing account

When to use: Mini podcasts, lectures, premium content

5. Photo Mode

How it works: Multiple photos + music = slideshow

When to use: Photo gallery, before/after, multiple products

Tip: 3-5 photos = ideal

6. Template Mode

The Secret: TikTok gives you ready-made template

How to use: Choose trending template → Upload your photos/videos → TikTok assembles automatically → Post!

Advantages: Zero editing skills + instantly professional

7. Green Screen Mode

How it works: You in foreground, video/image in background

When to use: Reactions, explanations, commentary on other content

Details in Section 9!

Best Mode for Each Content Type

Content Type Optimal Mode Ideal Duration
Dance/Challenges 15 seconds 8-15 seconds
Comedy 15-60 seconds 10-30 seconds
Educational 60 seconds - 3 minutes 45-90 seconds
Stories 60 seconds - 3 minutes 50-120 seconds
Products Photo Mode/60 seconds 20-40 seconds
Reactions Green Screen 15-45 seconds

Timeline Editing: Trim & Arrange

Understanding the Timeline

What is the Timeline?

Definition: Horizontal line displaying all video clips in order

Each small box = one clip | Length = time duration

Skill 1: Trimming

When you need it:

  • Remove boring beginning/ending
  • Delete mistakes
  • Shorten video

How to trim:

Method 1: Simple Trim

  1. Tap clip in Timeline
  2. Select "Adjust clips" or trim icon ✂
  3. Drag left/right edges
  4. ✅ Done!

Method 2: Precise Trim

  1. Tap clip
  2. Select "Split"
  3. Place cursor at cut point
  4. Clip splits into two parts
  5. Delete unwanted part

Professional Trimming Tips:

  • Trim beginning: Remove first 0.5 seconds (usually empty)
  • Trim ending: Leave 0.2 seconds at end (for smooth transition)
  • Trim mistakes: Split at error + delete + connect
  • Don't over-trim: Sudden jumps = annoying

Skill 2: Rearranging

How to rearrange:

  1. Long press on clip
  2. Drag left or right
  3. Place in desired position
  4. ✅ Done!

Golden Rearranging Rule:

First 3 seconds = Most important part!

Put your strongest shot/hook at the beginning

Skill 3: Deleting

How to delete a clip:

Method 1: Tap clip → Select "Delete" (trash icon 🗑)

Method 2: Long press clip → Drag upward → It disappears!

Warning:

⚠️ Can't undo after posting! ✅ Save original copy in Drafts

Skill 4: Combining

When to combine:

  • Multiple scenes = one video
  • Before/after
  • Multiple reactions

How to combine:

  1. Record all clips
  2. All appear in Timeline automatically
  3. Arrange as desired
  4. ✅ One connected video!

Professional Timeline Workflow

Steps in Order:

  1. Recording: Record all scenes (don't think about order yet)
  2. Review: Watch each clip, delete failures
  3. Trimming: Trim excess beginnings/endings
  4. Arranging: Arrange in best flow
  5. Connecting: Ensure transitions are smooth
  6. Enhancement: Add effects, text, music
  7. Preview: Watch complete before posting

Expected Time:

Video Duration Editing Time
15 seconds 2-5 minutes
60 seconds 5-10 minutes
3 minutes 15-30 minutes

Effects & Filters (100+ Options)

Difference Between Effects and Filters

Feature Effects Filters
Function Drastically change video Enhance colors and appearance
Examples Green Screen, Time Warp, Beauty Vintage, Bright, Cinematic
When to apply Before or during recording After recording (in editing)
Removable? ❌ No (baked into video) ✅ Yes (until posting)

Types of Effects

1. Face Effects

Most Popular:

  • Beauty: Smooth skin + brighten + enlarge eyes
  • Makeup: Virtual makeup (lipstick, eyeshadow)
  • Face Filters: Complete face change (animal, cartoon)
  • AR Filters: Augmented reality (glasses, hats)

Usage Tips:

  • ✅ Beauty at 30-50% = natural
  • ✅ Makeup for regular content
  • ✅ Face Filters for comedy only
  • ❌ Beauty at 100% = unnatural and obvious

2. Background Effects

  • Green Screen: Replace background
  • Blur Background: Blur background
  • Color Pop: You in color, background black/white

3. Motion Effects

  • Slow Motion: Slow down (like Matrix)
  • Fast Motion: Speed up (Time lapse)
  • Reverse: Reverse video
  • Loop: Repeat specific segment

When to use:

Effect Best Use
Slow Motion Dance, sports, dramatic moments
Fast Motion Cooking, preparation, artwork
Reverse Magic tricks, fantasy scenes
Loop Funny movement, special moment

4. Visual Effects

Most Popular:

  • Glitch: Technical glitch effect
  • Shake: Camera shake
  • Zoom: Sudden zoom in/out
  • Transitions: Transitions between scenes
  • Particles: Particles (stars, snow, hearts)

Types of Filters

1. Portrait Filters (For Face)

Filter Effect When to Use
Natural Subtle enhancement Daily content
Fresh Radiance + freshness Selfies, vlogs
Peachy Warmth + pink Fashion, beauty
Dawn Golden lighting Golden hour look

2. Vibe Filters (Overall Mood)

  • Vintage: Old-school look (70s/80s)
  • Film: Cinematic film look
  • Neon: Glowing neon colors
  • Retro: Classic retro
  • Dreamy: Dreamy and soft

3. Food Filters

Designed to make food look tastier:

  • Food: Color saturation + contrast
  • Yummy: Warmth + radiance
  • Tasty: Intensify colors

Tip: Use even if not food video - makes everything look better!

How to Choose the Right Filter/Effect?

By Content Type:

Content Type Best Filter Best Effect
Selfie/Vlog Natural, Fresh Beauty 30-40%
Dance Neon, Vintage Slow Motion specific clips
Comedy No filter (natural) Funny Face Filters
Cooking Food, Yummy Fast Motion for prep
Educational Clear, Natural Green Screen for explanations
Travel Travel, Sunshine Time Lapse

Best Practices

✅ Do:

  • Try 3-5 filters before choosing
  • Use same filter for series (brand consistency)
  • Test on different lighting types
  • Reduce intensity if too strong

❌ Don't:

  • Apply filter + filter (overfiltered)
  • Use too many effects in one video
  • Apply Beauty at 100%
  • Use trending effects after trend dies

How to Find Trending Effects?

Professional Text & Stickers

Adding Text

How to add text:

  1. Tap "Aa" icon (right side of screen)
  2. Type text
  3. Choose font and colors
  4. Adjust position and size
  5. ✅ Done!

Types of Text:

Type Usage Best Position
Title/Hook Grab attention in first 3 seconds Center screen, top
Subtitles Translate speech Bottom of screen
Call-to-Action "Follow", "Share", "Discover" Last 2 seconds, center
Information Details, numbers, facts Context-dependent

Text Formatting Options

1. Font Styles (100+ fonts)

Categories:

  • Classic: Clear and easy to read
  • Typewriter: Typewriter appearance
  • Neon: Glowing and shiny
  • Handwriting: Handwritten style
  • Serif: Professional (for serious content)

Most Popular Fonts:

  • Classic (default) - 65% of videos
  • Neon - for entertainment content
  • Typewriter - for stories and quotes

2. Colors and Backgrounds

Background Options:

  • No background: Text only (blends with video)
  • Colored background: Rectangle behind text
  • Outline: Border around text
  • Shadow: Shadow behind text

Color Tips:

Video Background Best Text Color Background
Dark White None or outline
Light Black None or shadow
Colored/Varied White Semi-transparent black background

3. Size and Position

Ideal Sizes:

  • Hook/Title: Large (30-40% of screen)
  • Subtitles: Medium (20-25%)
  • Additional Info: Small (15-20%)

Safe Positions:

  • Center: Slightly above or below center
  • Bottom: Above buttons (like, share)
  • Avoid: Far right (TikTok buttons)
  • Avoid: Too low (disappears under description)

Text Timing

How to control text timing:

  1. Add text
  2. Long press on it
  3. Select "Set duration"
  4. Set when it appears and disappears

Timing Rules:

  • Hook: 0-3 seconds (first thing to appear)
  • Subtitles: Exactly with speech
  • CTA: Last 2-3 seconds
  • Information: 3-5 seconds per point

Auto-Captions Tip:

New Feature in 2026:

  1. Tap "Aa"
  2. Select "Auto-captions"
  3. TikTok detects your speech automatically
  4. Review + edit errors
  5. ✅ Accurate subtitles in minutes!

Supported Languages: English, Spanish, +40 languages

Stickers

How to add sticker:

  1. Tap smiley face icon 😊
  2. Browse massive library
  3. Choose sticker
  4. Adjust size and position

Types of Stickers:

Type Usage Examples
Emoji Quick expressions 😂❤️🔥👏
Animated GIFs Movement and fun Sparkling stars, arrows, hearts
Text Stickers Ready-made words "OMG", "LOL", "WOW"
Icons Symbols Location, clock, phone
Interactive Interactive (polls) Vote, question, quiz

Interactive Stickers

Most powerful engagement tool!

  • Poll: Opinion poll (two choices)
  • Question: Open question
  • Quiz: Question with correct answer
  • Rating: 5-star rating

Why use them:

  • +60% increase in engagement
  • Algorithm loves them (encourages full watch)
  • Better understand your audience

How to add poll:

  1. 😊 → "Poll"
  2. Write question
  3. Write two options
  4. Place in visible spot
  5. ✅ Done!

Best Practices for Text & Stickers

✅ Do:

  • Use Subtitles: +40% watch rate (many watch without sound)
  • Strong Hook at start: Large text + curiosity-inducing
  • Choose contrasting colors: Clear text on any background
  • CTA at end: "Follow for more", "Share with friend"
  • Use interactive stickers: Poll in every video

❌ Don't:

  • Long text (max 10 words per sentence)
  • Glaring colors that hurt eyes
  • Too many stickers (max 3-4 in one video)
  • Text covering your face or main element
  • Hard-to-read fonts (fancy fonts)

Audio & Voiceover

Adding Music/Audio

How to add audio:

  1. Tap music icon ♪ (top right)
  2. Browse or search for audio
  3. Select audio
  4. Adjust desired segment
  5. Adjust volume
  6. ✅ Done!

Ways to Find Audio:

Method How When to Use
Trending "Trending" tab in audio library Want quick virality
Discover "Discover" tab → by mood Know mood but not song
Favorites "Favorites" tab → saved audios Want to use previously saved audio
Search Search by song/artist name Know exactly what you want
From FYP Watch video → Tap audio → "Use this sound" Liked audio in another video

Choosing the Right Audio

By Content Type:

Content Type Audio Type Examples
Dance Upbeat, Hip-hop, Pop Trending sounds with strong beat
Comedy Comedy clips, Memes, Expressive sounds Funny sound effects
Educational Quiet background music or no music Chill beats, Lo-fi
Vlog Indie, Pop, Feel-good Positive, comfortable music
Dramatic Epic, Emotional, Cinematic Impactful music
Travel Adventure, Uplifting Energetic music

Trending vs Original Audio:

Expert Strategy:

70/30 Ratio:

  • 70% of your videos: Trending audios
  • 30% of your videos: Original audios

Result: Get fast growth + build unique brand

Audio Adjustment (Volume & Timing)

Adjusting volume levels:

  1. Tap audio in editing
  2. Adjust Volume slider
  3. Rule:
    • Your voice (or original audio): 70-80%
    • Background music: 20-30%

Selecting specific audio segment:

  1. Tap audio
  2. Select "Edit sound"
  3. Drag cursor to desired segment
  4. ✅ Only this segment plays!

The Drop Tip:

In songs, "the drop" = strongest moment (main beat)

Strategy: Start video 2-3 seconds before drop → drop hits at 3-5 seconds = perfect!

Voiceover

How to record voiceover:

  1. After recording, tap 🎤 "Voiceover" icon
  2. Long press red record button
  3. Speak
  4. Release button = stop recording
  5. Listen to preview
  6. ✅ If satisfied, save

Professional Voiceover Tips:

  • Quiet space: Zero background noise
  • Close to mic: 6-8 inches from mouth
  • High energy: Enthusiasm = engagement
  • Clarity: Clear pronunciation, don't rush
  • Pauses: Natural pauses between sentences

When to Use Voiceover?

Case Why
Explaining steps Clearer than text
Telling story More impactful
Bad original audio Noise, wind, poor sound
B-roll content Footage without audio
Commentary on other video Reaction videos

Transitions & Video Speed

Transitions

What are Transitions?

Definition: The way video moves from one scene to another

Built-in Transition Types:

Type Description When to Use
Cut Direct cut (default) Fastest and most used
Dissolve Gradual fade Smooth, romantic transition
Slide Slide from side Change location/time
Zoom Zoom in/out Draw attention to something specific
Spin Rotation Fun/light content

How to add transition:

  1. In Timeline, tap between two clips
  2. Select "Transitions"
  3. Choose transition type
  4. Adjust duration (usually 0.5-1 second)
  5. ✅ Done!

Manual Transition:

Most professional!

Examples:

  • Hand Transition: Cover camera with hand → new scene
  • Object Transition: Pass object in front of camera
  • Spin Transition: Spin → new scene/outfit
  • Jump Cut: Sudden jump in location

How to execute:

  1. First scene: Do movement (e.g., hand approaches camera)
  2. Stop recording
  3. Change something: Clothes, location, etc.
  4. Second scene: Start from same movement (hand moves away)
  5. In editing: Delete gap between scenes = smooth transition!

Speed Control

How to change speed:

  1. Tap clip in Timeline
  2. Select "Speed" icon ⚡
  3. Choose desired speed
  4. ✅ Done!

Speed Options:

Speed Effect Best Use
0.1x - 0.5x Very slow (Super Slow Motion) Dramatic moments, sports, dance
0.5x - 0.9x Slow Emphasize details
1x Normal speed Regular content
1.1x - 2x Fast Speed up boring parts
2x - 3x Very fast (Time Lapse) Cooking, building, preparation

Advanced Speed Techniques:

1. Speed Ramp (Gradual Speed Change):

  • Start slow → gradual speed up → fast
  • How: Split clip into 3 parts, each different speed
  • When: Action scenes, dramatic entry

Speed Usage Tips:

  • Slow motion: Use 0.3x - 0.5x (clearer)
  • Time lapse: 2x - 3x sufficient (faster = annoying)
  • For music: Adjust speed to match beat
  • Avoid: Changing speed too often in one video

Reverse (Reverse Video)

How to reverse video:

  1. Tap clip
  2. Select "Reverse"
  3. Wait for processing (may take a minute)
  4. ✅ Video plays from end to beginning!

Creative Reverse Ideas:

  • Throwing: Throw something → Reverse = returns to hand!
  • Water: Pour water → Reverse = water returns to cup
  • Jumping: Jump down → Reverse = fly up
  • Cooking: Finished dish → Reverse = breaks into ingredients

Advanced Features

1. Green Screen (Most Powerful!)

What is Green Screen?

Definition: Replace background with another image or video

Don't need: Real green screen! TikTok detects background automatically

How to use Green Screen:

  1. Tap + button → "Green Screen"
  2. Choose background: photo from gallery, video from gallery, or another TikTok video
  3. Record yourself in front of camera
  4. ✅ You're in foreground, chosen background in back!

Top 10 Green Screen Uses:

Use Description Example
1. Reactions Your reaction to video Comment on funny video
2. Explanations Explain with illustrative image behind Lessons, information
3. Travel Appear as if in another place "When I go to Paris"
4. Before/After Old photo behind you Evolution, transformation
5. Products Product image behind you Review, explanation
6. Screenshots Comment on tweet/post Respond to drama
7. Comparisons Options behind you "Me vs My Brother"
8. News Presenting news Like news anchor
9. Comedy Fantasy scenes You in space
10. Storytelling Tell story with images Visual narration

Professional Green Screen Tips:

  • Good lighting: Even light on your face
  • Simple background: Single-color wall = easier
  • Distance from wall: 3-6 feet = better
  • No green clothing: Or it becomes transparent!
  • Avoid: Strong shadows behind you

2. Duet & Stitch

Duet:

Description: Your video next to someone else's video (split screen)

How: Watch video → Share → "Duet" → Record your response/performance → ✅ Both videos side by side!

When to use: Dance/challenge with someone else, reaction to video, singing with song

Stitch:

Description: Take 5 seconds from someone's video + add your response

How: Watch video → Share → "Stitch" → Choose 5 seconds → Record response → ✅ One connected video!

When to use: Answer question, correct information, complete story, comparison

3. Color Adjustment

Available Tools:

  • Brightness: Lighter/darker
  • Contrast: Difference between colors
  • Saturation: Color vibrancy
  • Warmth: Warm (yellow) or cool (blue)
  • Highlights: Bright areas
  • Shadows: Dark areas

How to adjust:

  1. Tap clip → "Adjust"
  2. Move sliders as needed
  3. See changes instantly
  4. ✅ Save if satisfied

Quick Tips:

  • Dark video: +Brightness +Shadows
  • Dull video: +Saturation +Contrast
  • Warm vibe: +Warmth
  • Cool vibe: -Warmth

4. Auto Enhance

What is it?

TikTok analyzes video automatically and applies best enhancements

How:

  1. Tap "Enhance" ✨ icon or magic wand
  2. Wait 2-5 seconds
  3. ✅ Instant enhancement!

What it enhances:

  • Lighting
  • Colors
  • Clarity
  • Contrast

Tip: Try Auto Enhance first, if not satisfied, adjust manually

Pro Workflow (10 Minutes/Video)

Complete Timeline

Stage 1: Planning (1 minute)

  • ✅ Define idea/message
  • ✅ Choose content type (comedy, educational, etc.)
  • ✅ Set target duration (15 seconds? 60 seconds?)
  • ✅ Choose audio in advance (if trending)

Stage 2: Recording (3-5 minutes)

  • ✅ Ensure good lighting
  • ✅ Record main scenes
  • ✅ Record extra B-roll (additional footage)
  • ✅ Repeat shot if not satisfied

Tip: Record more than needed = options in editing

Stage 3: Basic Editing (2-3 minutes)

  1. 30 seconds: Delete failed clips
  2. 30 seconds: Arrange clips in correct sequence
  3. 1 minute: Trim excess beginnings/endings
  4. 30 seconds: Adjust transitions

Stage 4: Enhancements (2-3 minutes)

  1. 30 seconds: Add/adjust audio
  2. 1 minute: Add basic text (Hook + CTA)
  3. 30 seconds: Apply filter
  4. 30 seconds: Add sticker/poll if appropriate

Stage 5: Review (1-2 minutes)

  • ✅ Watch complete video 2-3 times
  • ✅ Ensure: audio clear, text appears at right time, no obvious errors, appropriate duration
  • ✅ Fix any issues

Pre-Post Checklist

✅ Checklist:

Item Checked?
Strong hook in first 3 seconds
Clear audio (no noise)
Text clear and easy to read
Video not too long
CTA at end
Acceptable lighting
No spelling errors in text
Filters/effects not excessive

20 Hidden Features 90% of Creators Don't Know

1. Hands-Free Recording

How: Timer → Set 3 or 10 seconds → Tap Start → Step away, camera records itself!

Benefit: Dance, full-body videos without help

2. Flip Camera While Recording

How: Tap Flip icon 🔄 while recording

Benefit: Switch between front and back camera in same video

3. Flash While Recording

How: Tap lightning icon ⚡ → "On"

Benefit: Extra lighting in darkness

4. Smooth Zoom by Dragging

How: Drag up/down on screen while recording

Benefit: Smooth zoom in/out without stopping

5. Focus Lock

How: Long press on screen at specific spot → "AE/AF Lock"

Benefit: Focus and lighting don't change

6. Hidden Beauty Mode

How: Settings → "Beauty" → Adjust Smooth, Brighten, etc.

Benefit: Precise face enhancement (more than filters)

7. Record Without Sound

How: Before recording, mute your phone

Benefit: Silent video, then add audio/music

8. Save Video Without Watermark

How: Drafts → Share video to yourself → Download = no TikTok logo

Benefit: Use video on other platforms

9. Copy Text Timestamp

How: Add text → "Set duration" → Copy same timing for other texts

Benefit: All texts appear and disappear at same time

10. Repeat Sticker/Text in All Clips

How: Add sticker/text → "Apply to all clips"

Benefit: Personal watermark or logo in every video

11. Crop Video Size

How: After recording → "Adjust clips" → "Crop"

Benefit: Change frame, remove unwanted parts

12. Rotate Video

How: "Adjust clips" → "Rotate"

Benefit: Fix landscape-recorded video

13. Add Photos Inside Video

How: "Effects" → "Photos" → Choose photo → Appears as moving sticker

Benefit: Before/after, comparisons

14. Extract Audio from Video

How: "Sounds" → "Extract sound" from another video

Benefit: Use one video's audio in another video

15. Grid Lines

How: Settings → "Grid" → Choose type (3×3, squares, etc.)

Benefit: Professional composition (Rule of Thirds)

16. Filters Before Recording

How: Choose filter before hitting record

Benefit: See effect live = adjust lighting/angle

17. Auto-Save Drafts

How: If you exit editing, TikTok saves automatically in Drafts

Benefit: Never lose your work

18. Use Audio from Your Library

How: "Sounds" → "My sounds" → Upload MP3 from phone

Benefit: Original music, podcasts, etc.

19. Sync Video to Music

How: Choose audio first → "Sync" → TikTok suggests where to cut

Benefit: Automatic cutting to beat

20. Preview Before Each Edit

How: Before applying any effect/filter/text, tap "Preview"

Benefit: See effect before saving = don't waste time

7 Costly Mistakes Beginners Make

❌ Mistake 1: Over-Editing

Problem: Too many effects, transitions every second, excessive text and stickers, multiple filters

Result: Annoying video, viewers leave

Solution: "Less is More" rule - simplicity is stronger

❌ Mistake 2: Weak Hook

Problem: Boring first 3 seconds

Result: 70% of viewers leave immediately

Solution: Start with intriguing question, strong promise ("3 secrets..."), or shocking/surprising scene

❌ Mistake 3: Poor Audio

Problem: Background noise, audio too low or too high, music covering speech

Result: People don't understand = they leave

Solution: Record in quiet place, test audio before recording, background music 20-30% only

❌ Mistake 4: Unnecessarily Long Video

Problem: 3 minutes to explain something that takes 30 seconds

Result: Low completion rate = algorithm penalizes you

Solution: Cut all excess, every second has value, if it can be cut, cut it!

❌ Mistake 5: Unreadable Text

Problem: Font too small, text color blends with background, hard-to-read fancy font, text disappears quickly

Result: Message doesn't reach audience

Solution: Large clear font, contrasting colors (white on black for example), sufficient reading time (3-5 seconds)

❌ Mistake 6: Ignoring Lighting

Problem: Dark video or poor lighting

Result: Looks unprofessional

Solution: Record near window (natural light), or use lamp/ring light, avoid shooting against light (backlight)

❌ Mistake 7: Not Previewing Before Posting

Problem: Posting directly without watching completely

Result: Obvious errors = weak engagement

Solution: Watch video 2-3 times before posting, check everything, ask friend's opinion if possible

Action Plan: Beginner to Pro in 7 Days

Day 1: Basics

Tasks:

  • ✅ Read Section 2 (Editing Interface)
  • ✅ Record simple 15-second video
  • ✅ Learn trimming and arranging
  • ✅ Add one text
  • ✅ Save in Drafts (don't post yet)

Goal: Understand interface

Day 2: Audio and Filters

Tasks:

  • ✅ Read Section 5 (Effects and Filters)
  • ✅ Record new video
  • ✅ Add trending audio
  • ✅ Try 5 different filters, choose best
  • ✅ Save in Drafts

Goal: Master audio and filters

Day 3: Text and Stickers

Tasks:

  • ✅ Read Section 6 (Text and Stickers)
  • ✅ Record short educational video
  • ✅ Add Hook + Subtitles + CTA
  • ✅ Add interactive poll
  • ✅ Save in Drafts

Goal: Professional text

Day 4: Speed and Transitions

Tasks:

  • ✅ Read Section 8 (Transitions and Video Speed)
  • ✅ Record 3 different clips
  • ✅ Apply different speeds (slow motion, time lapse)
  • ✅ Use hand transition between clips
  • ✅ Save in Drafts

Goal: Dynamic editing

Day 5: Advanced Features

Tasks:

  • ✅ Read Section 9 (Advanced Features)
  • ✅ Try Green Screen
  • ✅ Record Voiceover
  • ✅ Use Color Adjustment
  • ✅ Save in Drafts

Goal: Master tools

Day 6: Practical Application

Tasks:

  • ✅ Read Section 10 (Pro Workflow)
  • ✅ Choose content style (educational/comedy/vlog)
  • ✅ Create complete video following workflow
  • ✅ Apply Pre-Post Checklist
  • Post first video!

Goal: Professional published video

Day 7: Improvement and Mastery

Tasks:

  • ✅ Review Day 6 video performance
  • ✅ Read Section 11 (Hidden Features)
  • ✅ Try 5 new hidden features
  • ✅ Create second video better than first
  • ✅ Post!

Goal: Complete mastery

After 7 Days:

🎉 Congratulations! You're now a TikTok editing pro!

Next Step:

  • Post 1-2 videos daily
  • Try different styles
  • Monitor Analytics to know what works
  • Develop your own style

Conclusion

Remember: The most powerful editing tool is TikTok itself!

Top 15 Lessons:

  1. 85% of viral videos are edited in-app
  2. Good editing = just 10 minutes (with practice)
  3. Strong hook in first 3 seconds = 70% of video success
  4. Trending audio = +300% virality chance
  5. Subtitles = +40% watch rate
  6. Filters improve look 10x
  7. Green Screen = most powerful tool for explanations and reactions
  8. Variable speed (Slow/Fast) = more dynamic
  9. Interactive stickers (polls) = +60% engagement
  10. Voiceover clearer than text for explanations
  11. Simplicity better than complexity (Less is More)
  12. Good lighting = professional difference
  13. Preview before posting = necessity
  14. Hidden features save time
  15. Practice = only way to master

Golden Rule:

Good video = strong content + simple editing + compelling hook

Not: too many effects + excessive complexity

Start Now:

Open TikTok → Tap + → Record first video → Apply what you learned → Post!

Remember: Every pro was once a beginner. The only difference? They started! 🚀

Related Topics

Last Updated: January 2026

Written by: D3mFollow team based on analysis of thousands of successful videos and testing hundreds of techniques.